What Are The Steps To Tiling A Bathroom?
Tiling a bathroom is one of the most important steps in any remodeling or renovation project. It can update the look of your bathroom, making it look more modern and stylish. However, tiling a bathroom can be a tricky and time-consuming process, so it’s important to know the steps to take to get it right. The following are the steps to tiling a bathroom:
1. Prepare the surface: Before you begin tiling, make sure the surface is clean and free of debris. You will also need to remove any existing flooring, if there is any, and repair any cracks or uneven surfaces.
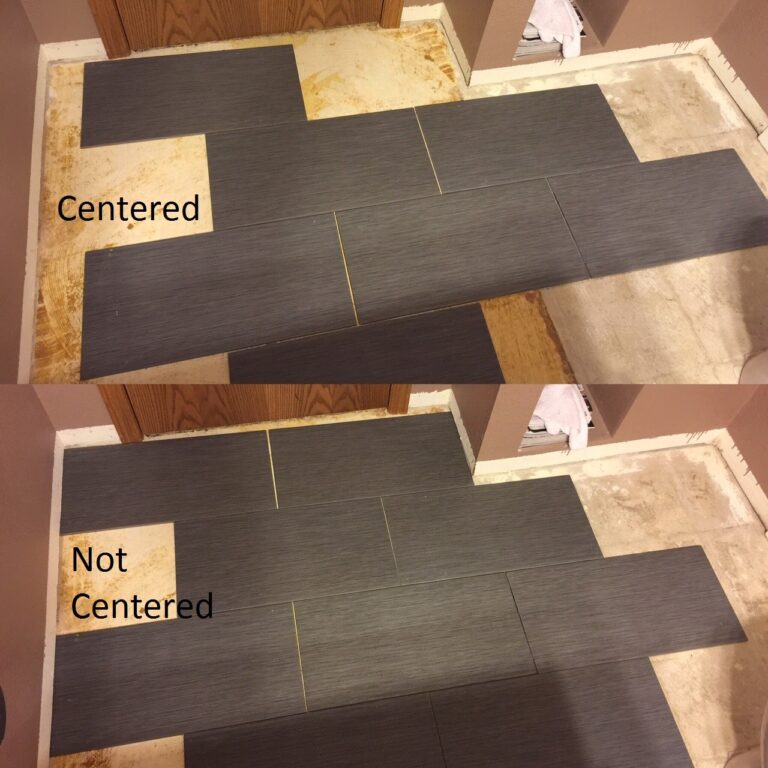
2. Measure and mark: Measure the area you will be tiling and make sure to mark the center with a pencil or chalk. This will help you ensure that your tiles are even and symmetrical.
3. Buy the tiles: When purchasing tiles, make sure to purchase enough to cover the entire area, plus a few extra for any mistakes.
4. Apply the adhesive: Apply the adhesive to the back of each tile before placing it down. Make sure to use the right type of adhesive for the type of tile you are using.
5. Lay the tiles: Begin laying the tiles in the center and work your way outward. Make sure to use spacers between each tile to ensure even spacing.
6. Grout the tiles: Once all of the tiles are laid, you will need to grout them. This will help seal the tiles and protect them from moisture.
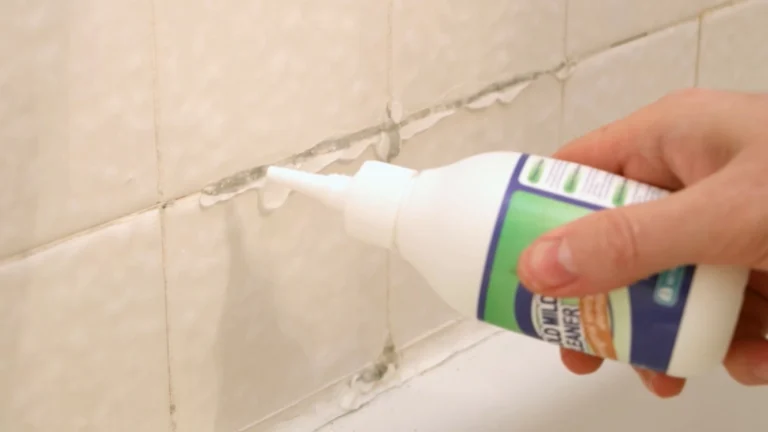
7. Clean the tiles: Once the grout has been set, use a damp cloth to clean the tiles and remove any excess grout.
These are the basic steps to tiling a bathroom. It is important to remember that if you are not experienced in tiling, it is best to hire a professional to do the job for you.
Preparing the Floor
Tiling a bathroom can be a daunting task, but it doesn’t have to be. With the right preparation and steps, you can create a beautiful finish that will last for years. The first step to tiling a bathroom is to prepare the floor. This involves removing any existing tiles, cleaning the floor, and marking out the area. It is important to make sure that the floor is as level and even as possible to prevent any lippage between the tiles later. Once the floor is ready to go, you can lay down your tiles and begin grouting. With the right steps and preparation, you can create a beautiful tiled bathroom with a professional finish.
Measuring the Room
Tiling a bathroom is a great way to add personal style to a home. Before you begin, make sure you have the right tools and supplies. It is important to measure the room accurately and prepare the subfloor properly. The first step in tiling a bathroom is measuring the room. You’ll need to measure the length and width of the floor. With these measurements in hand, you can calculate the square footage of the room and purchase the necessary tile. With the tile purchased, it is time to prepare the subfloor. If you’re working with an existing tile floor, then you’ll need to remove the existing tile and clean the surface thoroughly. If you’re working with a new subfloor, then make sure that the surface is level and free of debris. Once the subfloor is ready, you can begin the tiling process.
Choosing the Right Tiles
Tiling a bathroom can be a daunting task, but with the right preparation, the right materials, and the right guidance, you can create stunning results. One of the most important aspects of tiling a bathroom is selecting the right type of tile. Different tiles offer different benefits, so it’s important to consider your own needs before making a purchase.
Ceramic tiles are the most popular option for bathrooms, as they are waterproof, durable, and come in a range of colors and sizes. Porcelain tiles are also a popular choice, as they are extremely strong and resistant to staining. Natural stone tiles such as marble, granite, and travertine add a luxurious feel to any bathroom, but they need to be sealed regularly to prevent water damage. Glass tiles are a great way to add a modern and elegant look to any bathroom, but they can be more expensive and difficult to install.
Before you begin tiling, you should also take into account the size and shape of your bathroom. For small bathrooms, it can be best to stick to lighter colors and smaller tiles to make the room appear larger. For larger bathrooms, you can experiment with different shapes and sizes to create an interesting pattern or make a bold statement. It’s also important to consider the existing décor of your bathroom and choose tiles that complement the existing colors and textures.
No matter what type of tile you choose, it’s important to ensure you have the right tools and materials on hand before you begin the tiling process. With the right preparation, the right tiles, and the right guidance, you can create stunning results that will last for many years to come.

Grouting the Tiles
Tiling a bathroom can be a major undertaking, but the result is worth it. After you have laid out the tiles and applied the adhesive, it’s time to grout them. Grouting is essential to ensure your tiles are securely in place and to create the perfect finished look. Grouting is a relatively simple process that requires a few supplies and some patience. Here are the steps to grouting your bathroom tiles.
1. Prepare the Grout: Before you start grouting, make sure you choose the right type of grout for the job. Generally, sanded grout is used for larger joints (over 1/8 inch) and non-sanded grout is used for smaller joints (under 1/8 inch). It’s also important to use the right amount of water when mixing the grout. Too much water will make the grout weak and too little water will make it difficult to spread.
2. Apply the Grout: Using a grout float, start applying the grout in a circular motion along the joints of the tiles. Make sure to apply an even layer of grout and push it deep into the joints.
3. Remove Excess Grout: After you’ve applied all the grout, use a damp sponge to remove any excess grout from the surface of the tiles.
4. Let the Grout Cure: Once all the grout is applied and the excess is removed, let the grout cure for 24 hours before using the shower.
Grouting is an important step when tiling a bathroom, as it ensures the tiles are securely in place and creates a finished look. With the right supplies and patience, you can get the job done and have a beautiful new bathroom in no time.
Cleaning and Sealing the Tiles
Having a tiled bathroom is a great way to add sophistication to your space, but it’s important to take the time to properly prepare the area before starting the project. Cleaning and sealing your tiles is an important step in the tiling process and will ensure a long-lasting, professional finish. Cleaning and sealing the tiles before tiling will help to protect the tiles from staining and moisture damage, making your bathroom look as good as new for years to come.
Before starting the tiling process, use a non-abrasive cleaner to remove any dirt and grime from the tiles. Once the tiles have been thoroughly cleaned, use a sealant or grout sealer to protect the tiles from staining and water damage. Allow the sealant to dry completely before beginning the tiling process. Once the sealant is dry, it is time to start tiling. Ensure that the tiles are laid properly and that there are no gaps or cracks to ensure a long-lasting, professional finish.
Cleaning and sealing the tiles before tiling is an important step in the process, and it can save you time and money in the long run. Taking the time to properly clean and seal the tiles before tiling will ensure that your bathroom looks beautiful for years to come.
Finishing Touches
Completing the tiling of your bathroom is a rewarding experience, but it is not the end of your DIY journey. Once you have laid the tiles, it is time to finish the job with the necessary finishing touches. Here are some of the steps you need to take to do this:
1. Grouting: After you have laid all the tiles, it is time to grout and seal the tile joints to prevent water from seeping in between them. Use a rubber float to apply the grout and a damp sponge to remove the excess.
2. Caulking: Once the grout has dried, it is important to caulk the edges of the tiles to create a waterproof seal. Select a caulk that is specifically designed for bathrooms and tiles and use a caulking gun to apply it.
3. Sealing: Sealing your tiles will protect them from dirt and stains, and also ensure they last longer. Use a tile sealant that is specifically designed for the material of your tiles and apply it with a clean cloth or brush.
These steps, along with other finishing touches such as painting or wallpapering, will help you finish your bathroom tiling project. With the right planning and supplies, you can create the perfect bathroom of your dreams.
Troubleshooting Common Issues
Tiling a bathroom can be a big job, and as such, it’s important to tread carefully when it comes to the steps involved. But even the most experienced tile layer can run into unexpected issues during the installation. Fortunately, there are a few common problems you can anticipate and troubleshoot, including uneven grout lines, cracked tiles, and water seepage.
Uneven Grout Lines
Uneven grout lines can be caused by an uneven substrate, or the surface you’re laying tiles on top of. To avoid this issue, take the time to ensure that the substrate is level and smooth. If the grout lines are already uneven, you can fix them by removing the grout and applying new grout in even lines.
Cracked Tiles
Cracked tiles can be caused by various factors, from improper installation to faulty substrate to temperature changes. If you find a cracked tile, you’ll need to remove it and replace it with a new tile. When installing the new tile, be sure to use proper installation techniques and follow any manufacturer’s instructions to ensure the tile is secure.
Water Seepage
Water seepage is an issue that can occur even after the tiles are installed. To prevent water seepage, make sure all of your tiles are sealed properly and that the grout is applied evenly. You may also need to check the sealant around the edges of the tiles to make sure it’s intact. If you find any areas where water is seeping through, you’ll need to reseal the area.
FAQs About the What Are The Steps To Tiling A Bathroom?
1. What kind of tiling material should I use?
Answer: The type of tiling material you should use will depend on the size of your bathroom, the amount of water exposure it will receive, and your budget. Common materials include ceramic, porcelain, and stone tiles.
2. What tools do I need to tile my bathroom?
Answer: You will need a measuring tape, level, grout float, trowel, tile saw or wet saw, sponges, and a tile adhesive.
3. How should I lay out the tiles?
Answer: Start by laying out the entire area with tiles, making sure that the tiles are aligned correctly and that any cut tiles fit correctly. Once the layout is complete, you can then begin laying the tiles and filling in any gaps with grout.
Conclusion
The steps to tiling a bathroom can be a daunting task to take on, but when done correctly, it can be a rewarding accomplishment. The process includes measuring the area, cleaning the walls, prepping the surfaces, laying the tiles, and grouting the tiles. Additionally, there are some extra steps such as creating a design, cutting the tiles, and applying sealant. To ensure the success of the project, it is important to take the time to research and be prepared. With the right supplies and know-how, anyone can take on the challenge of tiling a bathroom.


