Ridgid Table Saw Blade Change
The Ridgid Table Saw is a powerful and versatile tool that can easily cut through a wide variety of materials. However, to make the most of your Ridgid Table Saw, it is important to make sure that you are using the right blade for the job. Changing the blade on your Ridgid Table Saw is easy and only takes a few minutes. This guide will walk you through the steps of changing the blade on your Ridgid Table Saw.
Preparation for Blade Change
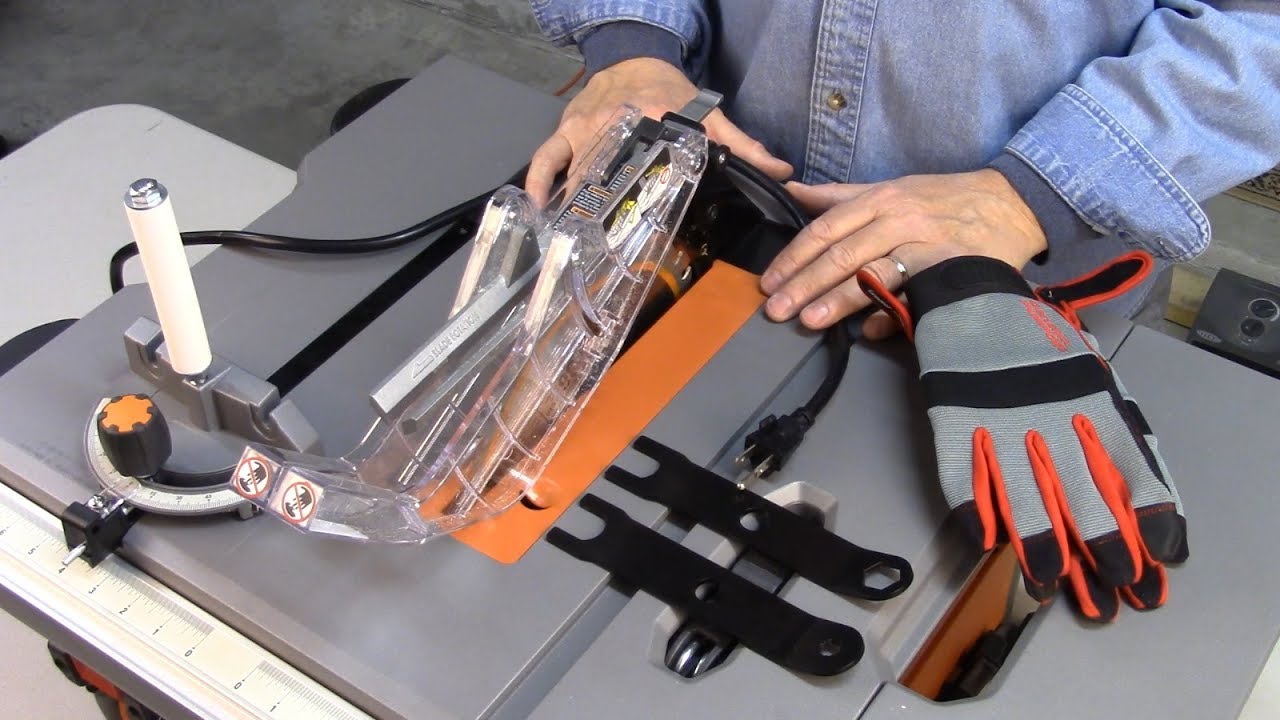
Changing a blade on a Ridgid table saw can seem like a daunting task for a novice. However, with the right preparation, it can be a relatively simple process. To start, it is important to unplug the saw and make sure it is off. This is a critical safety step that should not be overlooked. Then, remove the blade guard and the throat plate. The throat plate should be unscrewed and then lifted up to remove the blade.
Next, the arbor nut should be loosened with a wrench. This is the nut that secures the blade to the arbor. As the nut is loosened, the blade should come loose and can be removed from the saw. When installing a new blade, the process is reversed. First, the blade should be secured to the arbor, and then the nut should be tightened. Finally, the throat plate and the blade guard should be reinstalled.
By following the steps outlined above, even a novice can successfully change the blade on a Ridgid table saw. It is important to remember to take safety precautions and to always wear eye protection when working with power tools. With preparation and care, blade changes can be done quickly and easily.
Removing the Old Blade
Changing the blade on a Ridgid table saw can be a daunting task, especially for a novice woodworker. To make the process easier, it’s important to understand the steps involved in removing the old blade.
The first step is to unplug the saw from its power source. This is important for safety reasons, as the saw can be energized even when it is not in use. Once the saw is unplugged, the blade guard must be raised and the blade must be locked in place. This can be done by using the blade lock lever, which is located on the right side of the saw.
Once the blade is locked in place, the arbor nut must be loosened. This is a large nut that is located on the top of the saw. The nut should be loosened with a wrench. Once the nut is loosened, the blade can be pulled up off the arbor. After the blade is removed, it is important to inspect the arbor for any damage or wear.
The next step in the process is to install the new blade. This is done by aligning the blade with the arbor and then tightening the arbor nut. Once the nut is tightened, the blade can be tested to make sure it is properly secured.
Installing the New Blade
Installing the new blade in your Ridgid table saw is a straightforward process that requires only a few tools and materials. Before you begin, make sure that your power source is off and that you’ve properly disconnected the saw from any power source. You’ll also need a set of Allen wrenches and a T-handle hex key to loosen the blade nut.
Start by removing the blade guard and the blade washer. To do this, use the Allen wrenches to loosen the four screws that hold the blade washer in place. Once the blade washer is removed, you’ll be able to access the blade nut. Use the T-handle hex key to loosen the nut, and then remove the blade.
Now you can install the new blade. Place the blade in the saw and make sure that the teeth are pointing away from the blade guard. Secure the blade by tightening the blade nut, and then replace the blade washer. Finally, reinstall the blade guard, and make sure it is properly secured.
Once you’ve completed the blade change, it’s important to check the alignment of the blade and make sure that it’s securely fastened. You should also check the blade for any wear or damage, and make sure that it is properly sharpened. With the right tools and a few simple steps, changing the blade on your Ridgid table saw is a straightforward job.
Aligning the Blade with the Miter Slot
When changing the blade of a Ridgid table saw, it is important to ensure that the blade is properly aligned with the miter slot. The alignment will allow for better accuracy when making cuts. To do this, start by loosening the blade-tilt locking lever. Once this is done, move the blade to the desired tilt angle and lock the lever into place. Next, adjust the saw’s miter gauge so that it meets the blade’s angle. This can be done by loosening the miter gauge locking screws and adjusting the gauge to match the angle of the blade. Finally, make sure that the miter slot and the blade are aligned. If necessary, adjust the blade or miter slot to ensure a perfect alignment. Making sure that the blade is aligned with the miter slot is an important step in changing the blade of a Ridgid table saw. By following these steps, you can ensure that the blade is properly aligned for accurate and precise cutting.

Tightening the Blade
When it comes to changing the blade on a Ridgid table saw, it’s important to get it right. Tightening the blade is the most important step in the process. To do this, you’ll need a wrench and a torque wrench. Start by placing the wrench onto the arbor nut and turning it clockwise until it’s snug. Then, use the torque wrench to tighten the nut to the manufacturer’s recommended torque. If you don’t have a torque wrench, you can use a socket set to tighten the nut to the appropriate torque. To ensure the blade is secure, give it a quick test with your hand – if it doesn’t move, you’re good to go!
Verifying Proper Installation
Changing a table saw blade is a necessary part of regular woodworking maintenance and the process is made much easier with the right tools and steps. Once the blade has been changed, it’s important to verify that the new blade is properly installed and secure.
To ensure proper installation, make sure the saw blade is completely flat against the table and the arbor shaft is centered in the blade. Additionally, the blade should be tight against the arbor flange with no wobble.
To secure the blade, use the arbor lock to hold the blade in place. Make sure the blade is centered in the arbor flange and that the arbor washer is properly tightened.
Finally, check the blade for proper alignment. If it doesn’t look straight, use a square or straight edge to adjust the blade until it’s perfectly aligned. This will ensure that the blade won’t wobble during use and that the cuts will be clean and precise.
Following these steps will ensure that your table saw blade is properly installed and secure, so you can work with confidence. With the right tools and a few simple steps, you can quickly and easily change your table saw blade and verify that it is properly installed for safe and precise woodworking.
Cleaning Up the Workspace
It’s no secret that a clean and organized workspace is essential for any job, especially when it comes to a table saw blade change. A messy workspace can lead to confusion and potential hazards. To ensure a successful and safe table saw blade change, start by clearing your workspace of any debris or wood chips. This will make the blade change process easier and faster, and will also reduce the risk of getting injured. It’s also a good idea to wear protective gear like gloves and safety glasses. Once the workspace is clean, it’s time to move on to the actual blade change process.
Safety Considerations
When it comes to making table saw blade changes, safety is of the utmost importance. While a table saw can be an invaluable tool in a shop, it can also be a dangerous one if not used correctly. Ensuring that you take the proper safety precautions when changing the blade is essential.
First, make sure that the power to the saw is off and that the blade is completely stopped. As an extra precaution, you may wish to unplug the saw from the wall so that you don’t accidentally turn it on. Then, raise the blade to its highest point and lock it into place. This will help make sure that the blade is not going to move while you’re working.
Next, carefully remove the blade guard and any other components that are in the way. Now you can unlock the arbor nut, which is the large nut that holds the blade in place. Make sure to hold onto the blade while you loosen the nut. Once the nut is off, you can carefully remove the blade.
When you are ready to put the new blade in place, remember to use the appropriate blade for the job. Make sure to check the manual for your saw to ensure that you are using the right blade for the job. For example, if you are using a standard rip blade, it is important to make sure that it is designed for your saw.
FAQs About the Ridgid Table Saw Blade Change
Q1.How do I change the blade on my Ridgid table saw?
A1. To change the blade on your Ridgid table saw, you will need to loosen the blade collar, remove the old blade, and then install the new blade. Be sure to secure the blade collar firmly once the new blade is in place.
Q2. What type of blade should I use for my Ridgid table saw?
A2. The type of blade you should use for your Ridgid table saw will depend on the type of material you will be cutting. Be sure to consult the owner’s manual for your specific model to ensure you select the correct blade.
Q3. What safety precautions should I take when changing the blade on my Ridgid table saw?
A3. Be sure to unplug the power cord before beginning any work on your Ridgid table saw. Make sure the saw is turned off and the blade has come to a complete stop before attempting to change the blade. Wear protective gloves and goggles to protect your hands and eyes.
Conclusion
Changing a Ridgid table saw blade is a straightforward process that can be easily accomplished with the right tools and a bit of patience. With the correct steps followed, a new blade can be installed quickly and safely. The use of a blade-changing kit and the steps outlined above will ensure that the blade is properly secured and will provide a precise and clean cut.


