How To Skip Trowel A Ceiling
When it comes to creating a textured ceiling, you may want to consider skipping trowel. This is a technique of applying a thin layer of joint compound to the ceiling in a rhythmic pattern, resulting in a unique finish. It is relatively easy to do and provides a great look for any room. With a few simple steps, you can learn how to skip trowel a ceiling and create an eye-catching textured finish.
Preparation
and Application
Giving a ceiling a skip trowel finish is a popular way to create texture and depth in a space. Before beginning, it is important to prepare the ceiling by ensuring that it is completely clean and free of any debris. This can be done by vacuuming or using a damp cloth. Once the ceiling is prepped, it is time to begin applying the skip trowel. This process involves using a thin layer of drywall mud or joint compound and a trowel to create ridges and furrows. Depending on the desired texture, the trowel can be run in different directions. Once the desired texture is achieved, the ceiling should be allowed to dry before any further work is done.
For a quality finish, it is important to use the right materials and tools. A good quality skip trowel should be used to ensure a smooth and even texture. It is also important to use the correct type of joint compound or drywall mud. Additionally, a good quality brush should be used to help blend the mud into the ridges and furrows.
When skip troweling a ceiling, it is important to take the time to get the texture just right. With proper preparation and application, it is possible to create a beautiful finish that adds depth and texture to any space.
Tool Selection
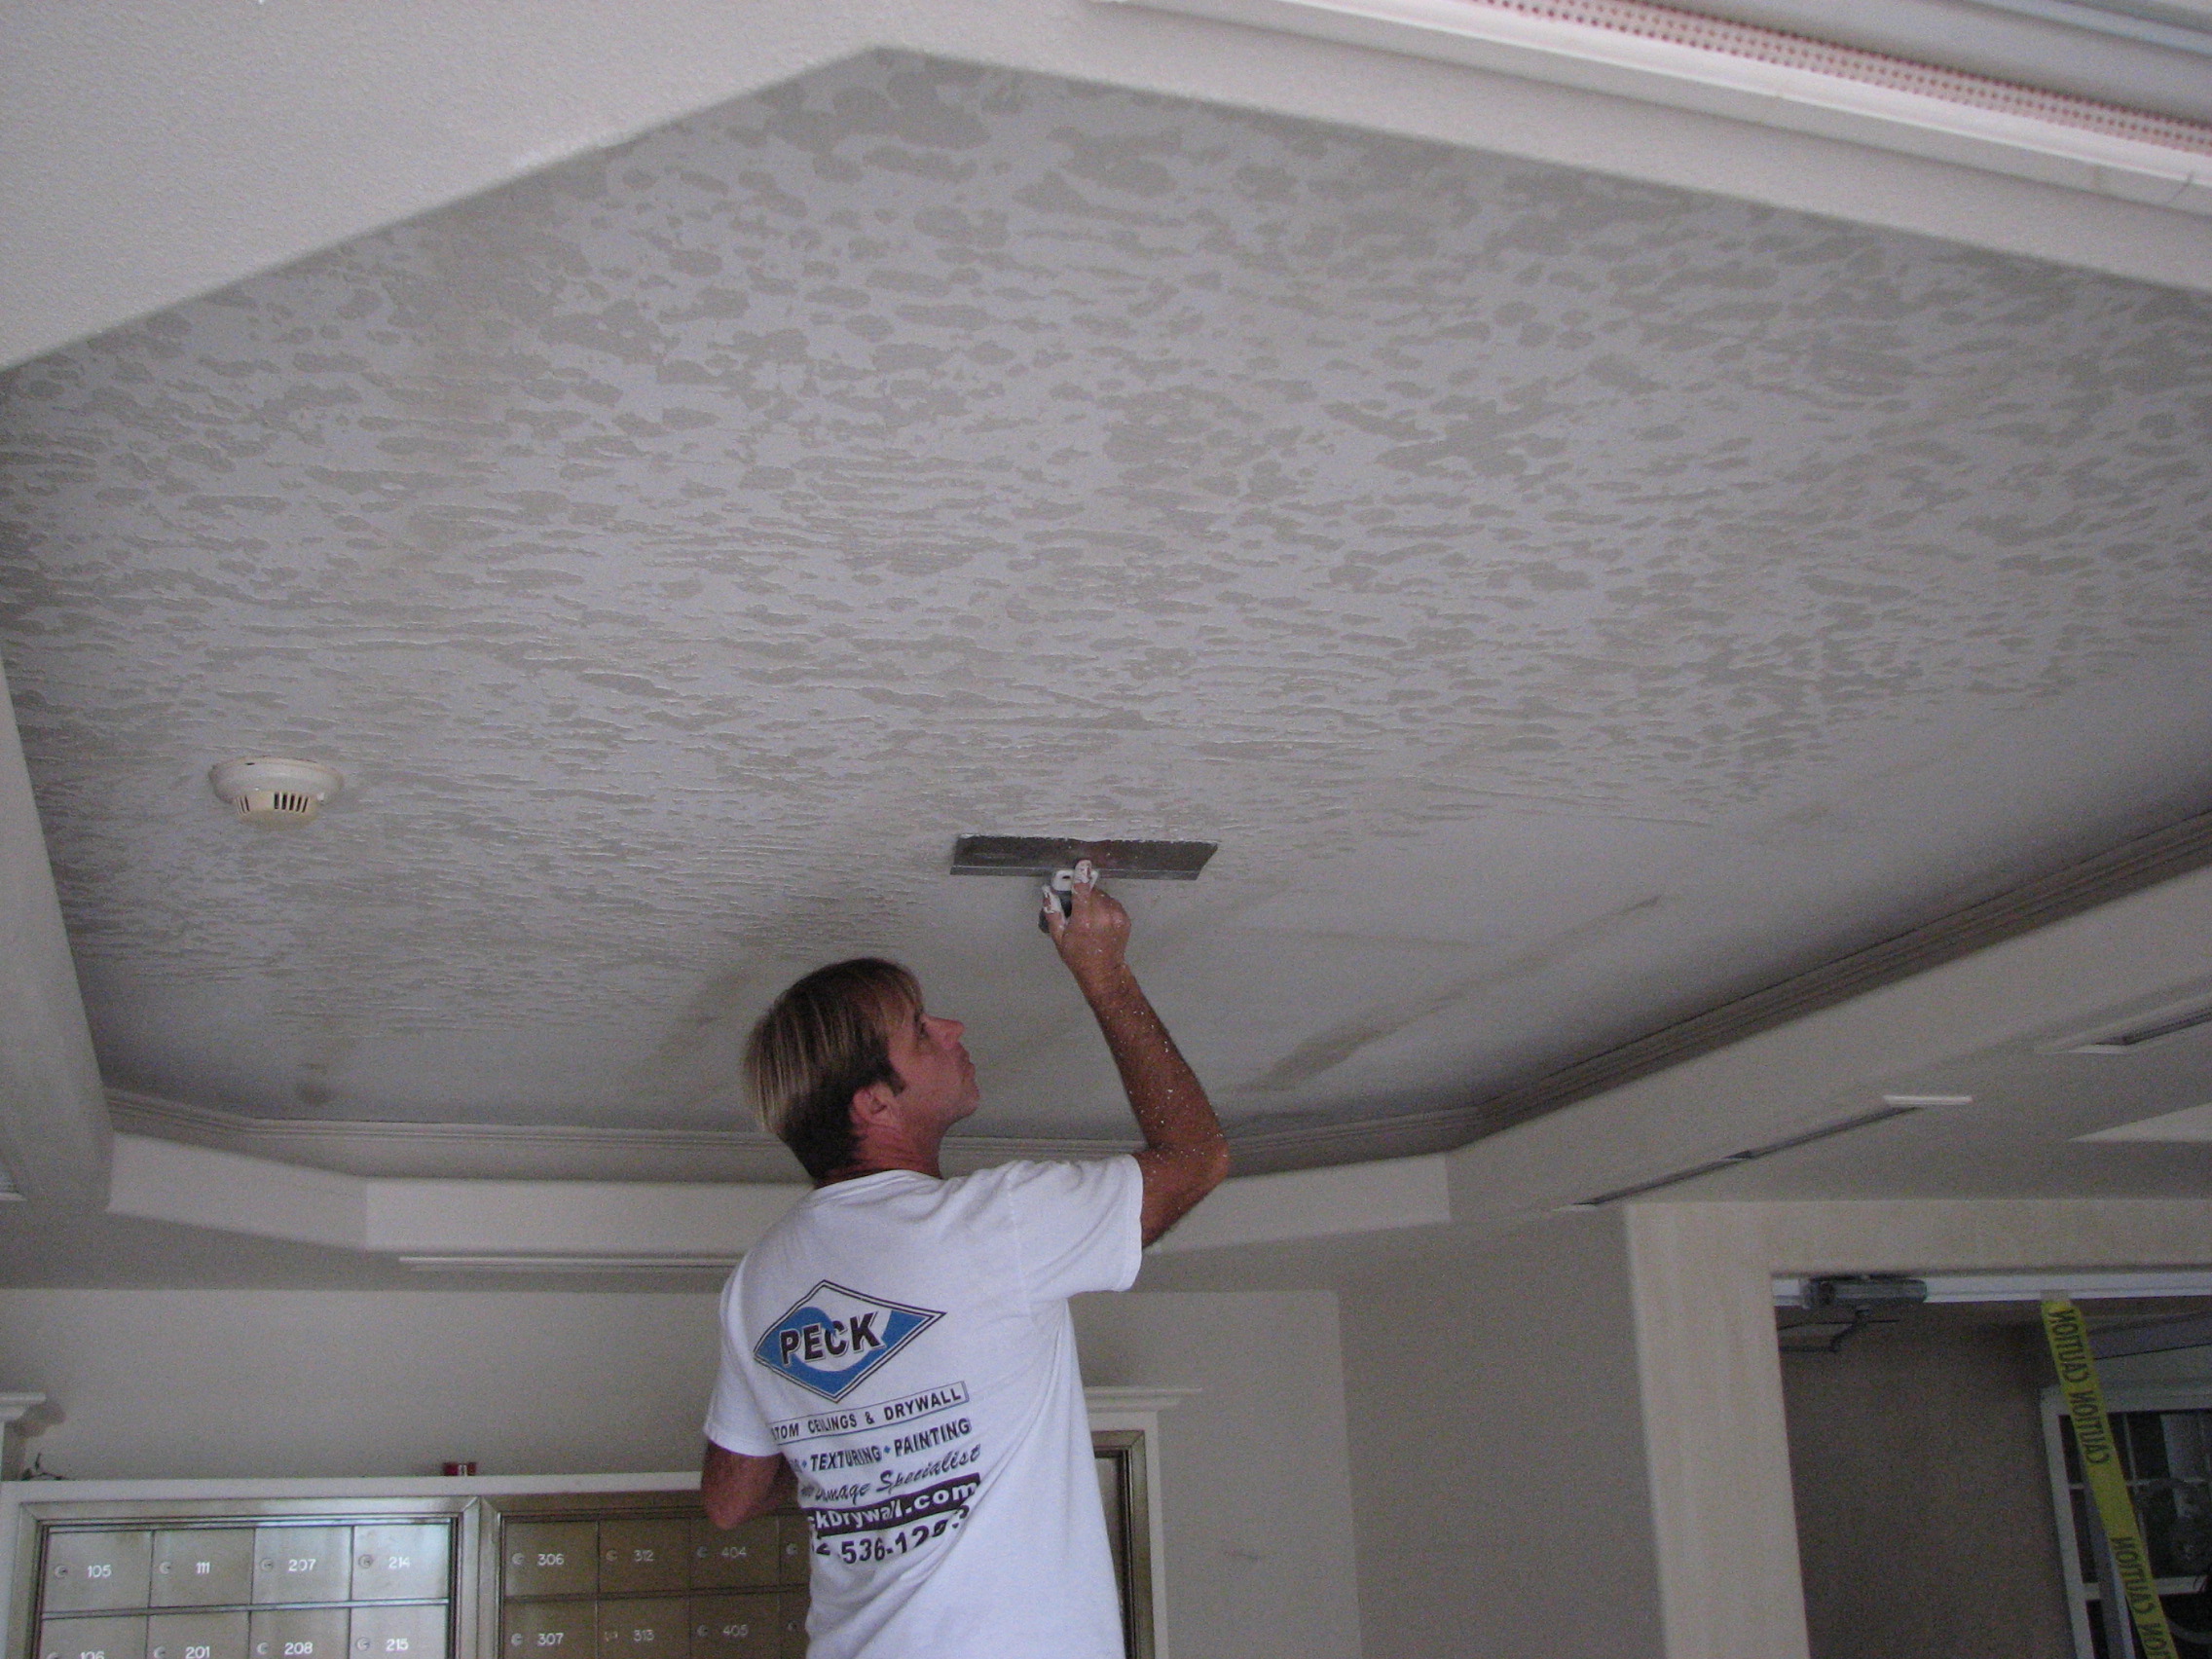
When it comes to skimming a ceiling, tool selection is key. Skim coating a ceiling requires the right tools to achieve a smooth, professional finish. The most common tool used for this job is the skip trowel, which is a special trowel designed to create a thin, even coat of plaster. It’s important to select the right type of trowel for the job; a trowel with a thin blade and sharp edges is the best choice, as it will help create a uniform finish. When selecting a skip trowel, you should also consider the size of the blade; the larger the blade, the more quickly you’ll be able to cover a larger area. Additionally, you should use a high-quality trowel to avoid the risk of damaging your ceiling. Other tools that may be necessary to complete the job include a hawk, a brush, and a bucket. It’s also important to have plenty of plaster or joint compound on hand, as well as a ladder and a drop cloth to protect the area. With the right tools and materials, you’ll be well on your way to achieving a smooth, professional finish on your ceiling.
Applying Compound
Creating a skip trowel ceiling is a popular drywall technique that provides an elegant, textured finish. To achieve this unique look, a thin layer of joint compound (otherwise known as “mud”) is applied to the ceiling using a special trowel. The goal is to achieve an even thickness of the compound while creating a stippled pattern.
To skip trowel a ceiling, you’ll need a few items: a hawk (a drywall tool used to hold compound), a trowel, a bucket of premixed joint compound, and a drywall knife. First, scoop up a portion of compound on the trowel and apply it to the hawk. Then, use the trowel to spread the compound across the ceiling in a thin, even layer. With a light sweeping motion, use the trowel to stipple the compound, creating a textured finish. Finally, use the drywall knife to clean up any mistakes.
It’s important to apply the compound evenly and lightly. Applying too much compound or applying it too heavily can result in a lumpy finish. It’s also important to work quickly since joint compound dries quickly. With a few simple tools and a bit of practice, you’ll soon be skip troweling your ceilings like a pro.
Spreading Compound
Skip trowel is a popular method used to resurface existing ceilings and is suitable for both drywall and plaster. The process involves spreading a thin layer of joint compound, also known as drywall mud, over the ceiling. This layer of mud provides a smooth finish that seals in any imperfections and gives the ceiling a polished look. This article will provide a step-by-step guide on how to skip trowel a ceiling, highlighting the importance of preparation, the supplies needed, and the application process.
The first step in skip troweling a ceiling is preparation. It is important to ensure that the ceiling is free from dirt, dust, and any other debris. It is also important to make sure that the ceiling is free of any cracks or holes. After the surface has been thoroughly cleaned, it is important to apply a primer. This will help to ensure that the joint compound adheres properly to the surface.
Once the surface is properly prepped, it is time to gather the supplies needed to skip trowel the ceiling. These supplies include a bucket of joint compound, a trowel, and a skip trowel. The skip trowel is a specialized tool designed specifically for skip troweling. It has a curved edge that allows for an even application of the joint compound.
The last step in the process is the actual application of the joint compound. This is done using the skip trowel. The process involves spreading a thin layer of joint compound over the ceiling in a circular motion. It is important to make sure that the layer is smooth and even. Once the entire surface has been covered, it is important to let the joint compound dry before applying a second coat.
By following these steps, you will be able to successfully skip trowel a ceiling and achieve a beautiful, smooth finish. The process can be time consuming but the end result is worth the effort.

Creating Texture
on a Ceiling
Creating texture on a ceiling is an excellent way to give any room a unique and stylish finish. Skip troweling is a popular and cost-effective method of creating texture on a ceiling that can be used by DIYers or professional contractors. This method is used to create a stippled, slightly raised texture on a ceiling, which can add depth and create interesting visual effects.
Skip troweling involves the use of a trowel to apply a thin layer of joint compound to the ceiling in a random pattern. The trowel is lightly dragged through the compound, creating a textured effect and allowing the joint compound to settle into the grooves. The grooves are then filled with joint compound and wiped with a wet sponge. This process is repeated until the desired texture is achieved.
Skip troweling is a great way to add interest and texture to a ceiling without having to invest in expensive materials or equipment. It’s a relatively simple process that doesn’t require a great deal of skill or experience. With a little patience and practice, anyone can master the art of skip troweling a ceiling with beautiful results.
Finishing Touches
Adding the finishing touches to a skip trowel ceiling is one of the most important steps in the process. After the cement is dry, it’s time to begin sanding the surface smooth, filling in any cracks or imperfections, and applying a coat of primer and paint. A few important steps must be taken before you begin to finish the ceiling.
First, you’ll need to apply a skim coat of drywall mud over the entire surface. This skim coat will provide a smooth base for the textured finish. You can either use a trowel or a putty knife to apply the mud. Make sure to smooth out any lumps or bumps and fill in any cracks or gaps.
Next, you’ll need to mix the skip trowel compound. This compound is made of drywall mud and sand, and it’s what will give your ceiling its textured finish. Mix the compound with a drill mixer and a mixing paddle until it has the consistency of cake batter.
Once the compound is ready, you can start applying it to the ceiling. Use a trowel to spread the compound in a circular motion, making sure to move the trowel in the same direction. As you go, create a pattern of swirls and ridges that will give the ceiling a unique texture.
Finally, once the compound is dry, you’ll need to apply a coat of primer and paint. You can choose any color you like, but keep in mind that the texture of the ceiling will be more visible with lighter colors. With these steps, you can easily skip trowel a ceiling and create a unique and beautiful finish.
Clean Up
After you have completed applying the skip trowel to the ceiling, it is time to clean up. Trowel marks should be wiped away with a damp cloth, and any residue should be removed with a vacuum cleaner. You may also need to use a brush to remove any remaining bits of drywall mud or other debris. Once the cleaning is complete, it is important to inspect the ceiling to ensure that there are no defects. If there are any imperfections, they should be addressed with a touch-up coat of drywall mud. Finally, the area should be sealed with a coating of primer and paint to prevent any dust or dirt from settling on the ceiling. With this step-by-step guide, you should now know how to properly skip trowel a ceiling. Following the steps outlined above will ensure that you have a beautiful, professional-looking ceiling that will last for years to come.
Troubleshooting
Troubleshooting common skip trowel ceiling problems is an important part of successful skip troweling. As with any task, it’s important to be prepared in case of any setbacks. The most common skip trowel ceiling problems are air bubbles, uneven texture, or stippling. To prevent any of these problems, it’s important to make sure you’re using the correct materials and techniques. If you find yourself in a situation where you’re experiencing any of these problems, it’s best to stop and assess the situation. You may need to redo the entire area or just make a few adjustments. Common solutions include adding extra coats of the skip trowel compound, using a different trowel, or sanding down the area before applying a new coat of the compound. If you’re having trouble getting the desired texture, it’s best to practice on a scrap piece of drywall before tackling the ceiling. With a little practice and patience, you’ll be able to achieve beautiful results with your skip trowel ceiling.
FAQs About the How To Skip Trowel A Ceiling
1. What types of materials are best suited for skip troweling a ceiling?
Answer: The best materials for skip troweling a ceiling are lightweight, low-shrinkage, and non-porous materials such as plaster, gypsum board, and drywall.
2. What tools are needed to skip trowel a ceiling?
Answer: To skip trowel a ceiling, you will need a trowel, a bucket of water, a sanding sponge, a brush, a dust mask, and a drop cloth.
3. How long does it take to skip trowel a ceiling?
Answer: The amount of time it takes to skip trowel a ceiling will depend on the size and complexity of the project. Generally, it can take anywhere from 1-3 hours to complete the job.
Conclusion
Skipping troweling a ceiling is a great way to get a professional-looking finish on your ceiling without having to spend a lot of time and effort. It is a simpler way of creating a smooth, even surface, and the end result will be a ceiling that looks great and is sure to impress. With the right tools and techniques, you can achieve a stunning finish in no time.