How To Install A Utility Sink
Installing a utility sink in your home can be a great way to add convenience and functionality to a laundry or utility room. A utility sink is a great way to tackle a variety of tasks from cleaning and prepping vegetables to soaking laundry and scrubbing muddy boots. With a few simple tools and some basic plumbing skills, you can easily install a utility sink in a short amount of time. This guide will walk you through the steps necessary to install a utility sink.
Gather the Necessary Materials
Installing a utility sink is a great way to add extra functionality to your laundry room or garage. Before you start your project, be sure you have all the materials you need to get the job done right. You’ll need an appropriate sink, a faucet, and of course, the necessary tools. Additionally, you’ll want to make sure you have a reliable water supply and the correct plumbing supplies.
Once you’ve gathered all the materials, you’ll be ready to get started with your installation. If you don’t feel comfortable tackling the job yourself, it’s always best to hire a professional plumber to do the work for you. This will ensure that the sink is properly installed and that all the plumbing is up to code.
Locate the Utility Sink’s Plumbing Connections
Installing a utility sink can seem like an intimidating job, but with the right preparation and steps, it can be done in a few hours. Before beginning the installation, it is important to locate the plumbing connections—the sink will need to be connected to the water supply as well as the drain. Locate the water shutoff valve for the sink and turn it off. Then, measure the distance from the shutoff valve to the sink and cut the supply line to the correct length. It is also essential to make sure the drain pipe is properly connected. The drain pipe should be connected to the T-fitting at the bottom of the sink and should be secured with a compression nut. Make sure the pipe is cut to the right length. With all the plumbing connections in place, the utility sink can now be installed.
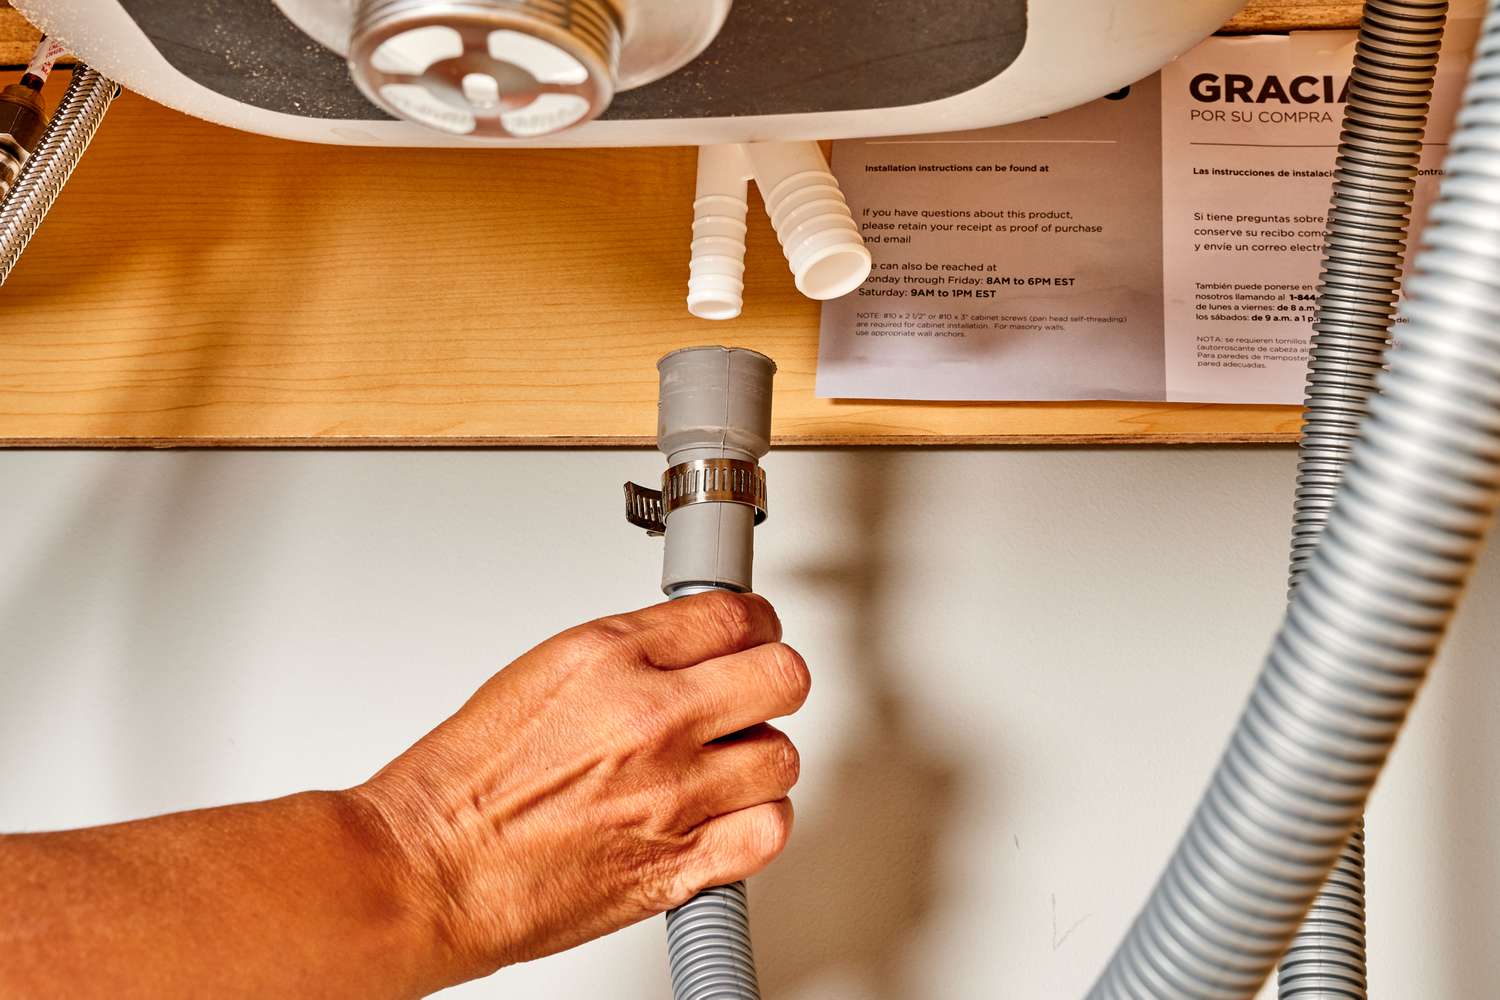
Connect the Drain Line
Installing a utility sink is a great way to add a functional and attractive addition to any home or business. After ensuring that the utility sink is properly placed and secured, it’s time to connect the drain line. This process can be a bit tricky, but with a few simple steps, it can be done with relative ease.
First, make sure the sink has the proper fittings to connect the drain line. Depending on the type of sink you have, you may need to purchase additional fittings. Next, measure the distance from the sink to the drain line and the drain line to the wall. Cut the drain line to fit the measurements and attach the fittings. Once the drain line is attached to the sink, connect the other end of the line to the wall.
Finally, test the connections to make sure there are no leaks. If any leaks are present, tighten the fittings and check for leaks again. Once the drain line is secure and leak-free, you can enjoy your new utility sink!
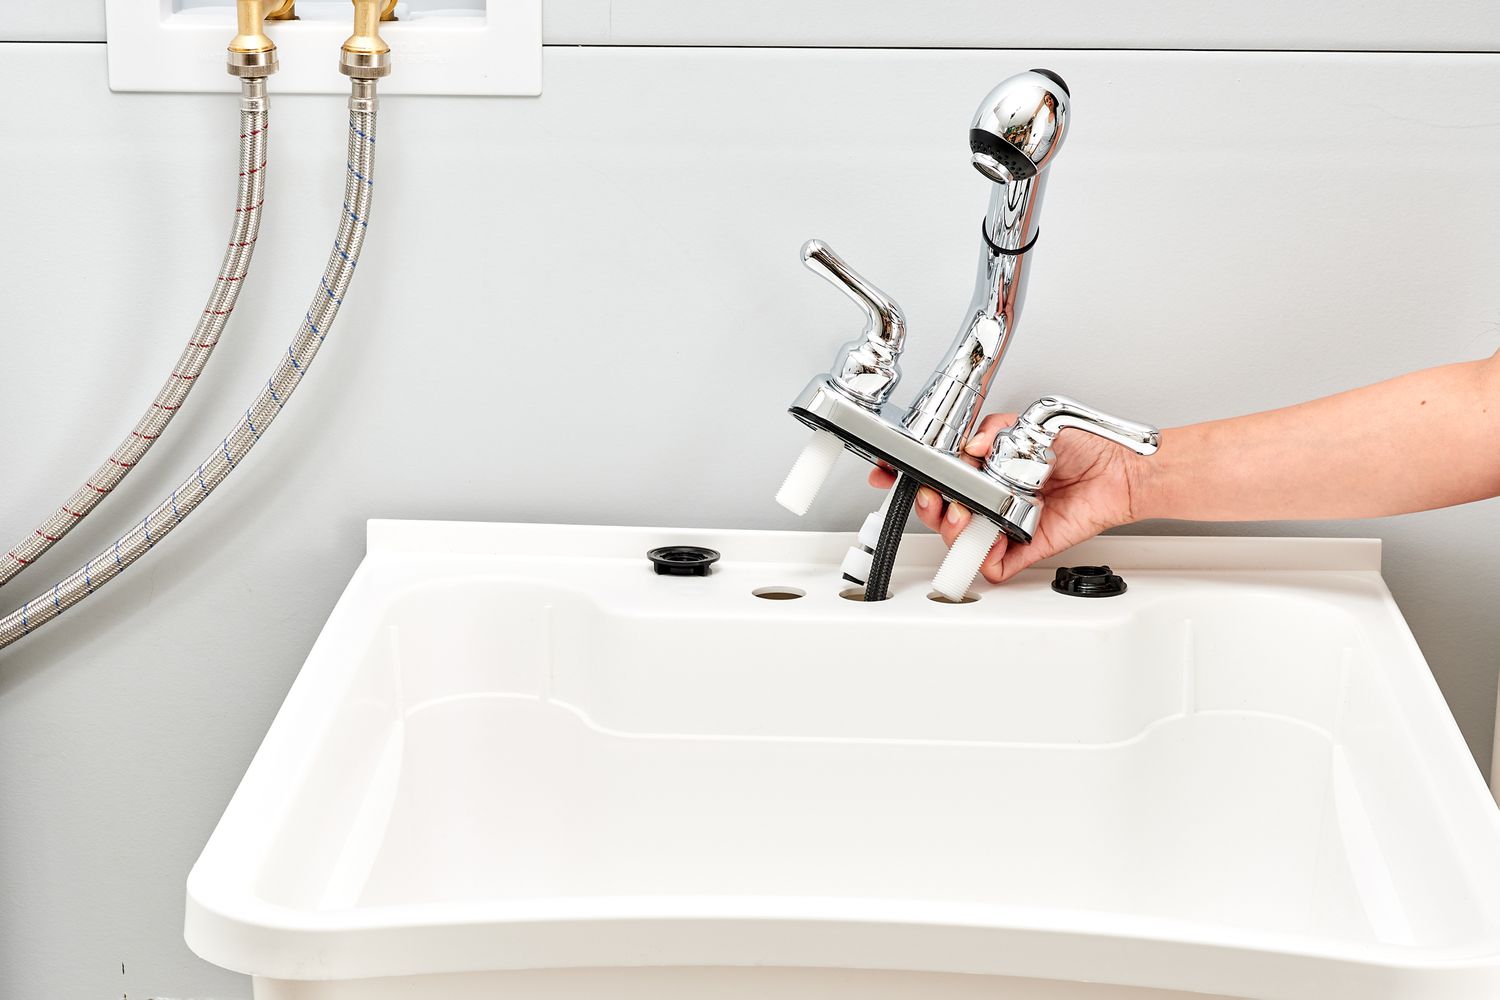
Install the Utility Sink Faucet
Installing a utility sink can be a daunting task, but with the right steps and tools, it’s easier than you think. After the sink is in place, it’s time to install the faucet. A utility sink faucet usually has three parts: the spout, the handles, and the supply lines. Start by connecting the supply lines to the cold and hot water pipes. Make sure the connections are secure and water-tight. Next, thread the spout onto the valve body and secure it with a mounting nut. Finally, attach the handles to the valve body. Make sure the handles are in the right position and secure them with the screws. If you’re having trouble with the installation, consult the manufacturer’s instructions or contact a professional plumber. With the right tools and know-how, you can install a utility sink faucet quickly and easily.
Secure the Utility Sink to the Wall
Installing a utility sink is a great way to add functionality to your home. While the installation process may seem intimidating, it’s quite straightforward. The next step in the installation process is securing the utility sink to the wall. This requires the use of wall anchors and screws, which are typically included in the sink’s installation kit.
Before beginning, it’s important to ensure the wall is strong enough to support the weight of the sink. If the wall is not sturdy, additional reinforcement may be necessary. After the wall is ready, mark the wall where the sink needs to be attached. Place the wall anchors into the wall and then use a drill to secure the screws into the anchors.
Once all the screws are in place, you’ll need to attach the sink to the wall. To do this, you’ll need to line up the sink’s mounting holes with the screws and then tighten the nuts to secure the sink in place. Once the sink is secured, attach any necessary plumbing and you’re all set! With these simple steps, you can easily install a utility sink in your home.
Make Final Plumbing Connections
Installing a utility sink is a great way to make your home more efficient and organized. After all the necessary preparations, the final step is making the plumbing connections to the sink. This can seem intimidating, but with the right tools and knowledge, it’s quite easy. Here are the steps to make the final plumbing connections to your utility sink.
Start by installing the drain and overflow pipes. Connect the drain to the sink’s tailpiece and secure it with slip nuts and washers. Make sure the connections are tight and won’t leak. Next, connect the overflow pipe to the sink’s overflow hole. This may require some cutting and fitting, so take your time and make sure the connection is secure.
After the pipes are in place, it’s time to run the water lines. Connect the hot and cold water lines to the shut-off valves and secure them with pipe tape and slip nuts. Make sure the connections are tight and no leaks are present. Finally, connect the faucet to the sink and secure it with mounting nuts.
Once the plumbing connections are complete, the final step is to turn on the water. Open the shut-off valves and test the sink. Make sure all the connections are tight and there are no leaks. Once you’re sure the sink is secure, you can turn on the faucet and enjoy your new utility sink.
Test the Utility Sink
Testing your utility sink is essential to make sure that it is properly installed and functioning. To test the utility sink, start by turning on the water supply to the sink and check for any leaks. It is also important to check the water pressure, as a low pressure will result in inefficient use of water. Additionally, check the hose connections for any signs of leakage. Finally, turn off the water supply and test the drain to make sure it is properly connected and that the sink can be emptied without any issues. Following these steps can help you ensure that your utility sink is properly installed and functioning.
Maintain the Utility Sink
Maintaining a utility sink is essential for optimal performance and long-term usage. To prevent the utility sink from becoming clogged or damaged, it is important to clean it regularly and inspect it for any cracks or blockages. In addition, it is important to check for any loose connections or leaky pipes and repair them immediately. To ensure the utility sink is functioning properly, it is essential to regularly check the supply and drain pipes for any blockages or leaks. In addition, it is important to clean the sink with an appropriate cleaning solution and wipe off any excess water regularly. Lastly, it is important to replace any missing or damaged parts to keep the sink in top condition. By following these steps, you can ensure your utility sink is maintained for optimum performance.
FAQs About How To Install A Utility Sink
Q: What tools will I need to install a utility sink?
A: You will need a variety of tools depending on the type of utility sink you are installing. Generally, you will need a drill, a wrench, a utility knife, pliers, a tape measure, a level, and a hacksaw. Additionally, you may need a spade bit, a jigsaw, and a hole saw depending on the type of installation.
Q: What type of plumbing is best for a utility sink?
A: The best type of plumbing for a utility sink is rigid copper or flexible supply lines. Both types of plumbing are durable and easy to install.
Q: What type of drain should be used for a utility sink?
A: The best type of drain to use for a utility sink is a deep-seal drain. This type of drain is designed to prevent water from backing up and is easy to install.
Conclusion
Installing a utility sink is a great way to add functionality to your laundry room, basement, or other area of your home. It is important to make sure you have the right tools and materials before you start, and that you take your time to ensure a safe and successful installation. With careful planning and preparation, you can easily and quickly install a utility sink in your home and enjoy its many benefits.