How To Install A Range Hood
Range hoods are a great way to keep your kitchen clean and odor-free. Installing a range hood is relatively simple and can help improve the air quality in your kitchen. This guide will provide you with the steps to install a range hood in your kitchen. You will need to have the proper tools and supplies to complete the installation. Once you have everything you need, you will be ready to install a range hood and enjoy the improved air quality in your kitchen.
Determine the Type of Range Hood You Need
Installing a range hood is an important step when it comes to improving the safety, ventilation, and aesthetics of your kitchen. But before you can begin the process, you need to determine what type of range hood you need. There are two main types of range hoods, ducted and ductless.
Ducted range hoods are connected to an exterior wall or roof vent, and use a fan to draw air away from the cooking area. This type of hood works best for kitchens that already have an existing ducting system, and it is more effective at removing smoke and odors than ductless range hoods.
Ductless range hoods, on the other hand, use a charcoal filter to trap contaminants instead of sending them outside. These hoods are easy to install and don’t require any ductwork, but they are not as effective at removing smoke and odors as ducted range hoods.
When selecting a range hood, you should also consider the size, style, and features that are available. You should choose a hood that is the right size for your kitchen and one that has the features you need. For example, if you need more lighting in your kitchen, you should look for a hood that has built-in lighting.
By taking the time to determine the type of range hood you need, you can ensure that your kitchen is safe and properly ventilated. With the right type of range hood, you can also improve the look and feel of your kitchen.
Gather the Necessary Tools and Materials
Installing a range hood can be a daunting task, but it doesn’t have to be. With the right tools and materials, you can complete the job with ease. Before you get started, make sure that you have everything you need. Depending on the type of range hood you purchased, you will need a drill, screws, screwdriver, wire cutters, and a level. Additionally, you should have a tape measure, gloves, and safety glasses. Also, make sure you have the manufacturer’s instructions handy. Once you have all of the necessary materials, you can start the installation process.
Prepare the Hood for Installation
Installing a range hood can be a daunting task, but with some preparation and the right tools, it can be done. Before beginning installation, it’s important to prepare the hood for successful installation. First, be sure to read the manufacturer’s instructions and check the parts list. Make sure that the hood is the correct size and is compatible with the range and kitchen layout. Next, measure the distance between the hood and the range, and then measure the distance from the hood to the ceiling. This will help you determine the proper fit and alignment of the hood. Additionally, be sure to pick up any necessary mounting brackets or screws, as well as the correct power cord for the hood. Once you have everything ready, you’re ready to begin the installation process.
Install the Mounting Bracket
Installing a range hood is a great way to add value and style to your kitchen. Before you begin, make sure you have all the necessary tools and materials on hand. In this blog, we’ll take you through the steps needed to install a range hood correctly.
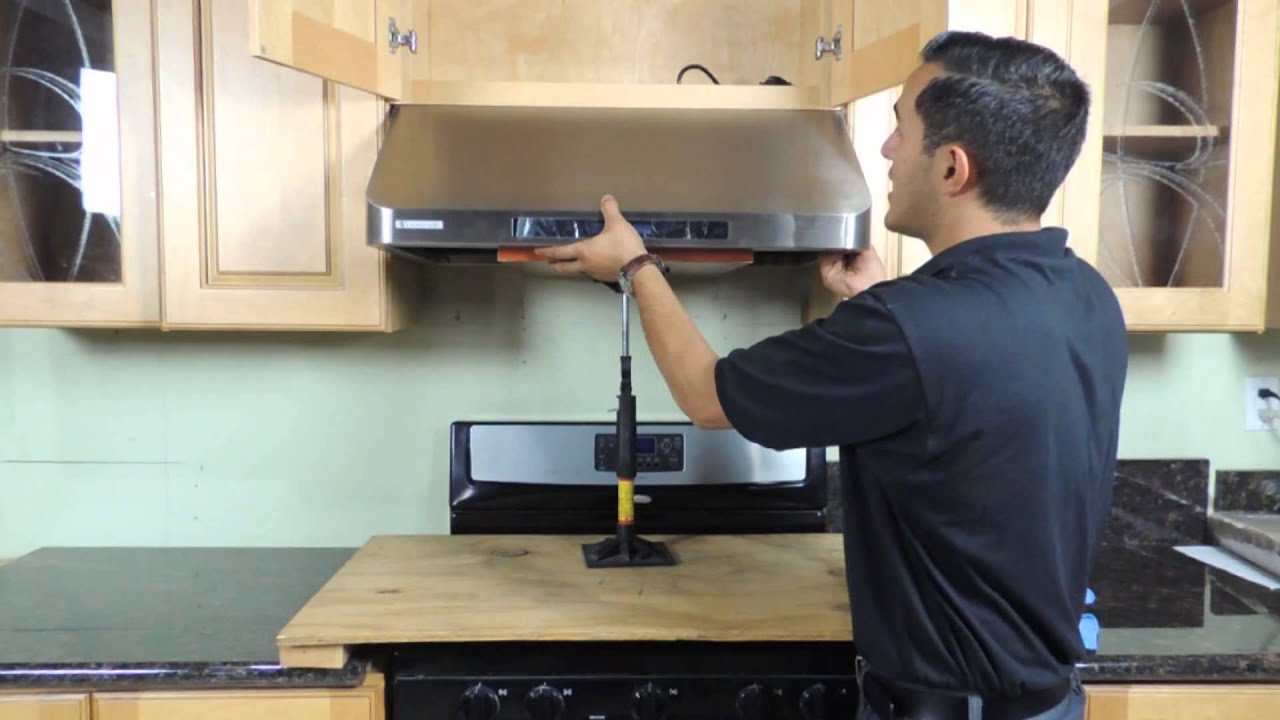
The first step in installing a range hood is to install the mounting bracket. This is usually done by attaching the bracket to the wall and screwing the range hood into it. It’s important to use the correct screws and anchors to ensure the bracket is secure. If you’re working with an existing range hood, make sure to check the manufacturer’s instructions for specific mounting instructions.
Next, you’ll need to connect the wiring. This is usually done with a junction box and wiring from the range hood to the junction box. Make sure to connect the wiring correctly and make sure the hood is powered off before making any connections.
Once the wiring is connected, you can attach the range hood to the mounting bracket. Make sure the hood is secure and properly aligned before tightening the screws.
Connect the Wiring
Properly connecting the wiring is essential for the safe functioning of a range hood. Depending on the type of hood you purchased, you may need to connect to a direct power source or to the existing wiring in your home. If you are unsure of what to do, it is best to consult a professional electrician.
Before connecting, always double-check the wiring directions from the manufacturer. Shut off the power at the main breaker box and use a voltage tester to make sure the power is off. Once power is shut off, use wire connectors to connect the wiring and ensure that the wiring is secure. It is important to use the proper gauge of wire for your particular hood.
Once the wiring is connected, you can secure the range hood to the wall and screw it in place. Lastly, turn the power back on and test the range hood to make sure it is properly functioning. Always remember to follow safety protocols and use proper protective gear when working with electricity.
Secure the Range Hood
Securing the range hood is an important step in the installation process. To ensure a secure fit, you need to match the size and type of range hood to the size and type of range. This will ensure that the hood fits snugly in place and won’t come loose when in use. You will also need to make sure that the mounting brackets are securely fastened to the wall and that the range hood is securely screwed into the mounting brackets. You may also need to adjust the hood to ensure a secure fit. Once you have ensured a secure fit, you can enjoy the benefits of having a range hood installed.
Test the Range of the Hood
Installing a range hood is a relatively easy task, but it is important to test it out after installation to ensure that it is working properly and can be used safely. Testing a range hood is simple and can be done with a few simple steps.
First, turn the power to the range hood on, and turn the fan switch to the highest setting. This will test the fan’s ability to draw air and exhaust it properly. Next, turn on the light switch and make sure the light is working. Finally, check to make sure all venting components are properly attached and secured.
When testing a range hood, it is important to use caution and to follow all safety guidelines. Make sure that the area around the range hood is clear of all flammable materials. Additionally, never use a range hood for any purpose other than what it was designed for.
Once the range hood has been tested, it is important to periodically check it for any signs of damage or issues that could compromise its effectiveness. If any problems are found, it is best to replace the range hood, as a malfunctioning range hood can be a fire hazard.
By taking the time to properly install and test a range hood, homeowners can rest assured that their family and home are safe.
FAQs About the How To Install A Range Hood
Q1: What tools do I need to install a range hood?
A1: You will need a drill, an adjustable wrench, a Phillips head screwdriver, and a level.
Q2: What type of range hood should I buy?
A2: When buying a range hood, make sure to purchase one that is designed to fit your specific model of stove. Additionally, consider the noise level, type of filter, and any other features you may want.
Q3: How long does it take to install a range hood?
A3: Installing a range hood typically takes approximately 1-2 hours, depending on the type of hood and your experience level.
Conclusion
Installing a range hood is an easy task. With the right tools and instructions, you can have a new range hood up and running in no time. Be sure to make your measurements and use the manufacturer’s instructions for the best results. With a few hours of work, you can have a new range hood installed and be ready to cook up a storm.