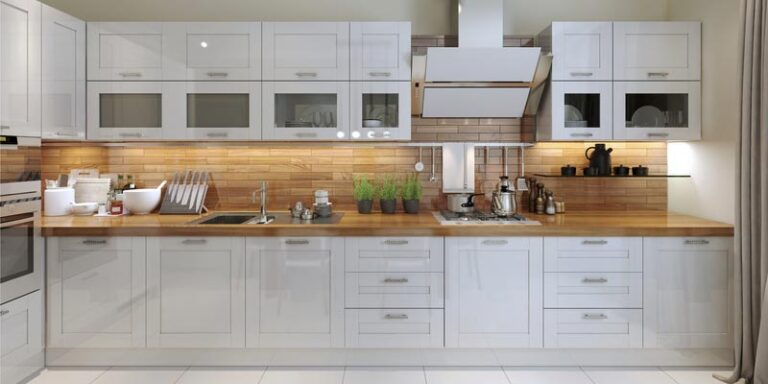
How Do You Square A Cabinet?
Squaring a cabinet is an important step in the construction process as it ensures your cabinet will have a flush, even appearance. This process involves measuring the exact dimensions of the cabinet and making sure all components are level and square. This can be done using a carpenter’s square, a level, and a measuring tape. Once the cabinet is square, the pieces can then be joined together using screws, nails, or glue. Squaring a cabinet requires patience and precision, but it will result in a beautiful, well-made piece of furniture.
What Is Squaring a Cabinet?
Squaring a cabinet is a process that ensures the cabinet is properly aligned and level. It is an important step in the installation process that ensures the cabinet is secure and can support the weight of the items inside. Squaring is done by measuring and adjusting the cabinet’s sides, top, and bottom so that they are all even. This helps to ensure the cabinet will not shift during use, which can lead to serious injuries or structural damage. It is a relatively simple job that can be done with basic tools and a level.
When squaring a cabinet, it is important to measure the entire cabinet, including the sides, top, and bottom. Measure each side from corner to corner and then adjust the cabinet as necessary to make sure all sides are of equal length. Check the top and bottom of the cabinet to make sure they are even and level. Lastly, use a level to ensure the cabinet is level and secure.
Squaring a cabinet is a relatively simple process that can be done with a few basic tools. It is an important step in the installation process that ensures the cabinet is secure and can support the weight of the items inside. Squaring is done by measuring and adjusting the cabinet’s sides, top, and bottom so that they are all even and level. Following these steps will help to ensure a safe and secure cabinet installation.
Preparing Your Cabinet for Squaring
Squaring a cabinet is an essential step in the process of making furniture. It involves ensuring that the sides of the cabinet are parallel and square with the other sides. This can be a tricky process, as even the slightest misalignment can lead to problems down the line.
Before beginning the squaring process, it’s important to make sure that the cabinet is level. This is necessary for the cabinet to be accurately measured and squared. Additionally, inspect the cabinet components for any damage or irregularities that could potentially affect the process. To ensure that the cabinet is level, use a carpenter’s level to check the cabinet from all angles.
Once the cabinet is level, the squaring process can begin. Using an adjustable square and a straight edge, measure each side of the cabinet and ensure that all of the angles are equal. If the angles are not equal, adjust the cabinet components until they are. Once the angles are equal, use a carpenter’s level to check the cabinet from all angles.
Squaring a cabinet is a crucial step for any furniture-making project. Following the above steps before beginning the squaring process will help ensure that the cabinet is squared accurately and quickly. With a little patience and attention to detail, your cabinet will be squared and ready for its next step in the furniture-making process.
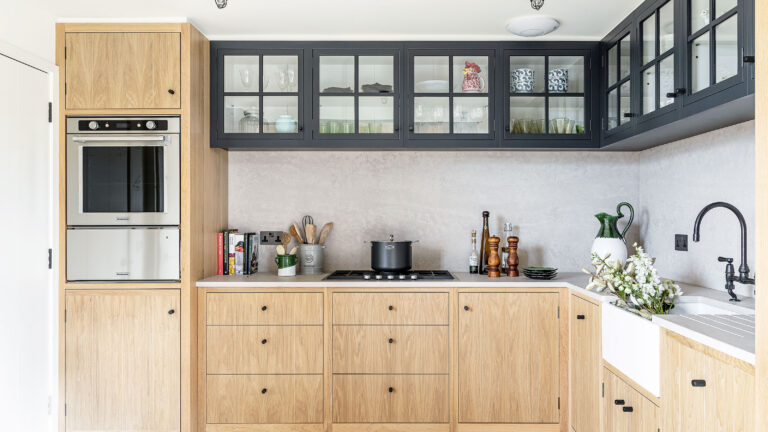
Credit: www.cliqstudios.com
Measuring and Marking the Cabinet
Having the right tools is key when figuring out how to square a cabinet. Before starting, make sure you are equipped with a carpenter’s square, a level, a tape measure, and a pencil. Once you’ve got the tools ready, you can begin measuring and marking the cabinet.
Start by measuring the top, bottom, and sides of the cabinet. Take special care to make sure the diagonal measurements of the cabinet are equal. If they are not, then the cabinet is not square. You can also measure the cabinet’s corners to ensure they are at right angles.
Once you have taken the measurements, mark the cabinet with a pencil so that you know exactly where you are going to cut and assemble the pieces. Make sure the marks are clear and easy to follow. Once you have marked the cabinet, you can start assembling the pieces and squaring the cabinet.
Cutting the Cabinet for Squaring
Cutting the cabinet for squaring is an important step in creating a perfect fit. To ensure a perfect and even fit, the cuts need to be precise and square. This requires a bit of skill and attention to detail, but the result is well worth the effort.
The first step is to measure and mark the area to be cut. Measure twice mark once, and use a square or a straight edge to ensure the measurements are accurate. Once the measurements are marked, it’s time to use the power tool. As the blade is lowered into the wood, the cut should be made in a single, smooth motion. Make sure to keep the blade parallel to the edge of the cabinet for the best results. If necessary, make several passes with the saw to ensure a clean, square cut.
For added accuracy, use a router to cut. The router is a more precise tool than a saw and can be used to make very precise cuts. However, when using a router, make sure to take extra precautions to ensure the safety of yourself and others.
Once the cabinet has been cut, use a sanding block to smooth the edges. This will ensure a perfect fit when the cabinet is squared. Finally, use a level to ensure the cabinet is perfectly aligned. With the right tools and a bit of patience, squaring a cabinet is a relatively straightforward task.
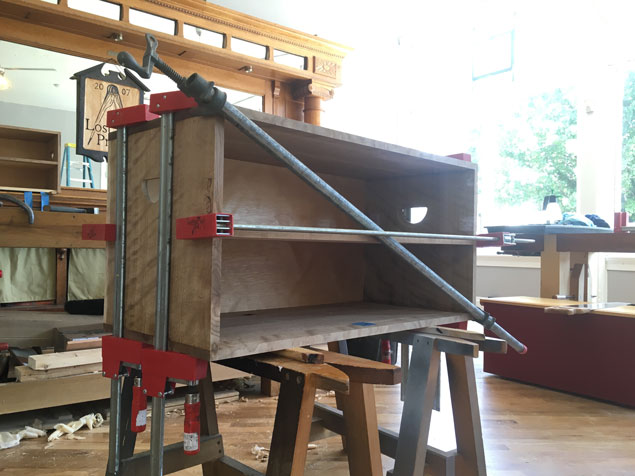
Gluing and Clamping the Cabinet
The process of squaring a cabinet is an important step in creating a professional-looking, well-built piece of furniture. After you’ve cut the pieces of wood to the right size and shape, the next step is to glue and clamp the cabinets together. This is where the right tools and materials become essential. You’ll need good quality wood glue, clamps, and protective gear to ensure a safe and secure fit. To begin, lay out the pieces of wood on a flat surface and apply a generous amount of glue to the edges. Carefully line up the pieces and clamp them together. Make sure the glue is evenly distributed and all of the pieces are properly aligned. Leave the clamps on for at least 24 hours to ensure the glue has had enough time to set. After the glue has dried, you can sand down any excess glue and begin staining and finishing your cabinet. With a few simple tools and materials, and a little patience, you can square a cabinet like a pro.
Finishing the Squared Cabinet
It’s a common dilemma for many home renovators: you’ve got a cabinet, but it’s not quite square. What do you do? Fortunately, squaring a cabinet is not as difficult as it seems. With the right tools and a little bit of know-how, it’s easy to get a cabinet-looking square and level in no time.
First, make sure you have the right tools. You’ll need a level, a square, and a set of clamps. Clamps are essential for holding the cabinet in place while you make adjustments. Once you have your tools, begin by placing the level on the cabinet door to check for alignment. If it’s off, use the square to check for squareness.
Once you’ve determined how the cabinet needs to be adjusted, use the clamps to secure it in place. Then, use a flathead screwdriver or a chisel to loosen and shift the cabinet’s hinges until the door is level. You may also need to adjust the screws that hold the door in place.
Finally, use the level and square again to check the cabinet. When it’s perfectly square and level, re-tighten the screws and clamps. With a few simple steps, you’ll have a perfectly squared cabinet in no time.
Tips for Squaring a Cabinet
Squaring a cabinet is an important part of ensuring the structure is secure and can support the weight of the cabinet’s contents. This is especially true if you’re installing a wall cabinet or a base cabinet. Knowing how to square a cabinet is a valuable skill for handymen and DIYers alike. Here are some tips to help you ensure the perfect fit:
- Measure twice, cut once: Before you make any cuts, measure the frame, door, and cabinet multiple times to make sure they’ll fit properly. Once everything is cut, it’s difficult to make adjustments.
- Use a framing square: Always use a framing square when squaring a cabinet. This will help you ensure the frame is perfectly square and will fit snugly against the wall.
- Adjust the hinges: If the header or hinge isn’t perfectly square, adjust it slightly to fit the frame. Make small adjustments until the cabinet fits snugly against the wall.
- Check for level: Use a level to check the cabinet’s alignment and make sure it’s even. If the cabinet is crooked, make adjustments to the cabinet or wall until it’s level.
Squaring a cabinet can be tricky, but with the right tools and a bit of patience, you can ensure your cabinet is perfectly fitted and securely mounted. Follow these tips and you’ll be sure to get the perfect fit!
Troubleshooting Common Squaring Issues
Squaring a cabinet is one of the most important parts of any carpentry project. It is essential to ensure that the cabinet is properly installed and that the finished product is aesthetically pleasing. While the process of squaring a cabinet is relatively straightforward, there are some common problems that you may encounter. This article will explore some of the common issues that you may encounter when squaring a cabinet and provide tips on how to troubleshoot them.
One of the most common squaring issues is when the cabinet’s corners don’t line up. This can be caused by several factors, including incorrect measurements, poor cutting techniques, or even incorrect installation. To ensure that your cabinet’s corners line up, it is important to measure accurately and take the time to ensure that your cuts are precise. Additionally, it is important to ensure that all four corners of the cabinet are secured in place before you begin to square it.
Another common squaring issue is when the cabinet is not level. This can be due to the ground or floor being uneven, or it can simply be because the cabinet was not properly installed. To ensure that your cabinet is level, it is important to use a leveler or a plumb bob when installing it. Additionally, you should also check the ground or floor for any dips or bumps that may cause the cabinet to be off-level.
Finally, when squaring a cabinet, you may also encounter issues with the cabinet’s door. This is usually due to the door not being properly aligned with the cabinet’s frame. To fix this issue, it is important to ensure that the door is aligned with the cabinet frame before you begin to square it. Additionally, it is important to ensure that the door is level and properly secured in place.
By following these tips, you can ensure that your cabinet is properly squared and that the finished product is aesthetically pleasing. Squaring a cabinet is an important part of any carpentry project, so it is important to take the time to ensure that everything is done correctly.
FAQs About the How Do You Square A Cabinet?
1. What tools are needed to square a cabinet?
Answer: To square a cabinet, you will need a combination square, a level, a screwdriver, a drill, and a hammer.
2. What is the best way to make sure the cabinet is square?
Answer: The best way to make sure a cabinet is square is to measure the corners to make sure they are all 90 degrees. You can also use a level to ensure the cabinet is level.
3. What type of material should I use to secure the cabinet in place?
Answer: The best material to use for securing a cabinet in place is screws. Make sure to use the appropriate size screws to ensure the cabinet is securely attached.
Conclusion
Squaring a cabinet is a fairly straightforward process that requires the correct tools and some basic carpentry skills. It involves measuring and adjusting the cabinet’s walls, sides, and corners to ensure that they are all at the same angle and to make sure that the cabinet sits perfectly square and level. Squaring a cabinet is an important step in creating a high-quality, professional-looking piece of furniture. With the right tools, technique, and patience, anyone can square a cabinet and have a great-looking finished product.