How Do You Seal An Undermount Sink Countertop?
Undermount sinks provide a sleek and modern look for kitchen countertops. However, if not properly sealed, water can seep through the countertop and cause water damage or mold growth. To properly seal an undermount sink countertop, you will need to use a silicone adhesive and caulk to create a watertight seal between the sink and the countertop. Additionally, an epoxy adhesive may need to be used in order to adequately secure the sink to the countertop. By taking the time to properly seal an undermount sink countertop, you can prevent water damage and ensure your kitchen remains beautiful and functional for years to come.
Understanding Undermount Sink Countertop Installation
Installing an undermount sink countertop is a great way to improve your kitchen’s look and functionality. It is important to understand the installation process to ensure that your undermount sink countertop is properly sealed and secured. This article will provide an in-depth analysis of the installation process so that you can ensure your undermount sink countertop is properly sealed and secure.
First, a few basic tools are necessary for installation. These include a drill, drill bit, jigsaw, level, stud finder, silicone caulk, and other necessary hardware. Ensure that all the necessary tools are on hand before starting the installation process.
Next, it is important to measure the area in which the countertop will be installed. Measure the sink opening and the countertop to ensure that the two fit together properly. Then, use the drill and drill bit to create holes for the mounting screws.
Once the holes are drilled, you can secure the countertop to the base using the mounting hardware. It is important to make sure that the countertop is level and secure before moving on to the next step.
Finally, use the silicone caulk to seal the gap between the countertop and the sink opening. This will help to keep water from seeping underneath the countertop and causing damage. Allow the caulk to dry before using the sink.
In conclusion, installing an undermount sink countertop is a relatively straightforward process that can greatly improve the look and function of your kitchen. With the right tools and proper installation techniques, you can ensure that your undermount sink countertop is properly sealed and secure.
Preparing to Install an Undermount Sink Countertop
Installing an undermount sink countertop involves more than just setting the sink and attaching it to the countertop. It requires a few extra steps to make sure that the sink and countertop are properly sealed and secure. Properly sealing an undermount sink countertop requires precise measurements, a few materials, and the right technique.
To get started, you’ll need to measure the sink and countertop to make sure the sink will fit properly. This step is essential to ensure that the area around the sink where the sealant will be applied is the right size. Once you’ve done this, you can begin preparing the countertop surface for the sealant. You’ll need to remove any existing sealant, then clean and dry the surface.
Next, you’ll need to apply the sealant. You’ll want to use a high-quality caulk that’s specifically designed for use with sinks. This type of sealant is designed to create a watertight barrier between the sink and countertop. You’ll want to be sure to apply the sealant in a consistent pattern and make sure it’s evenly distributed.
Finally, you’ll need to secure the sink to the countertop. This can be done with screws, clips, or even adhesive. The type of fastener you choose will depend on the type of sink and countertop you have. Once you’ve secured the sink, you can then apply a bead of caulk around the edge of the sink to ensure a tight seal.
By following these steps, you can make sure that your undermount sink and countertop are properly sealed and secure. This will help to ensure that your countertop looks great and performs properly for many years to come.
Installing the Undermount Sink Countertop
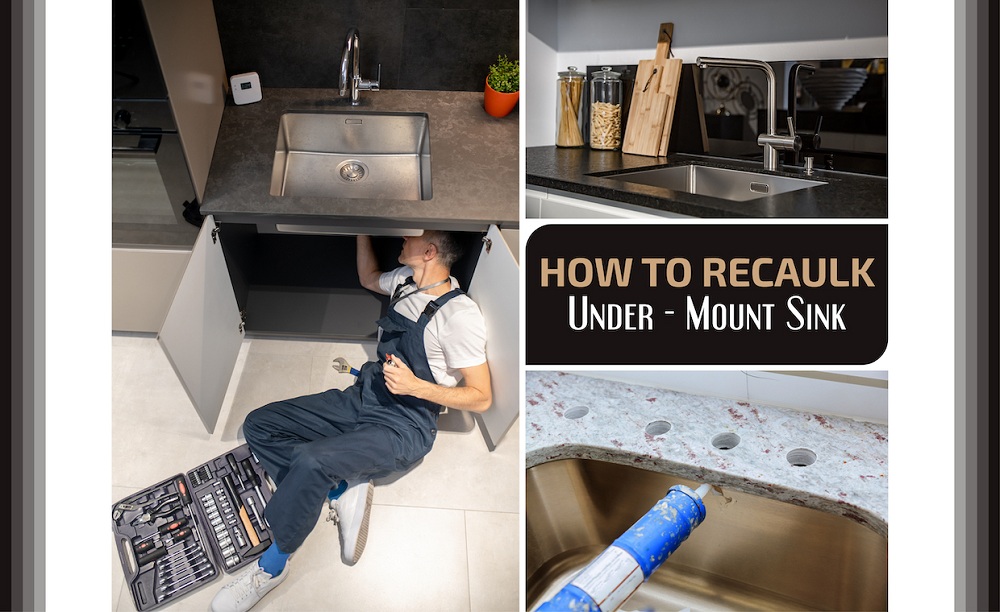
Undermount sinks are a great way to add a modern, updated look to any kitchen countertop. They are also relatively easy to install, making them an ideal choice for DIYers. To seal an undermount sink countertop, you will need the right supplies and some basic tools. First, you will need to obtain a good quality silicone caulk and a caulk gun. You may also need a putty knife and some sandpaper.
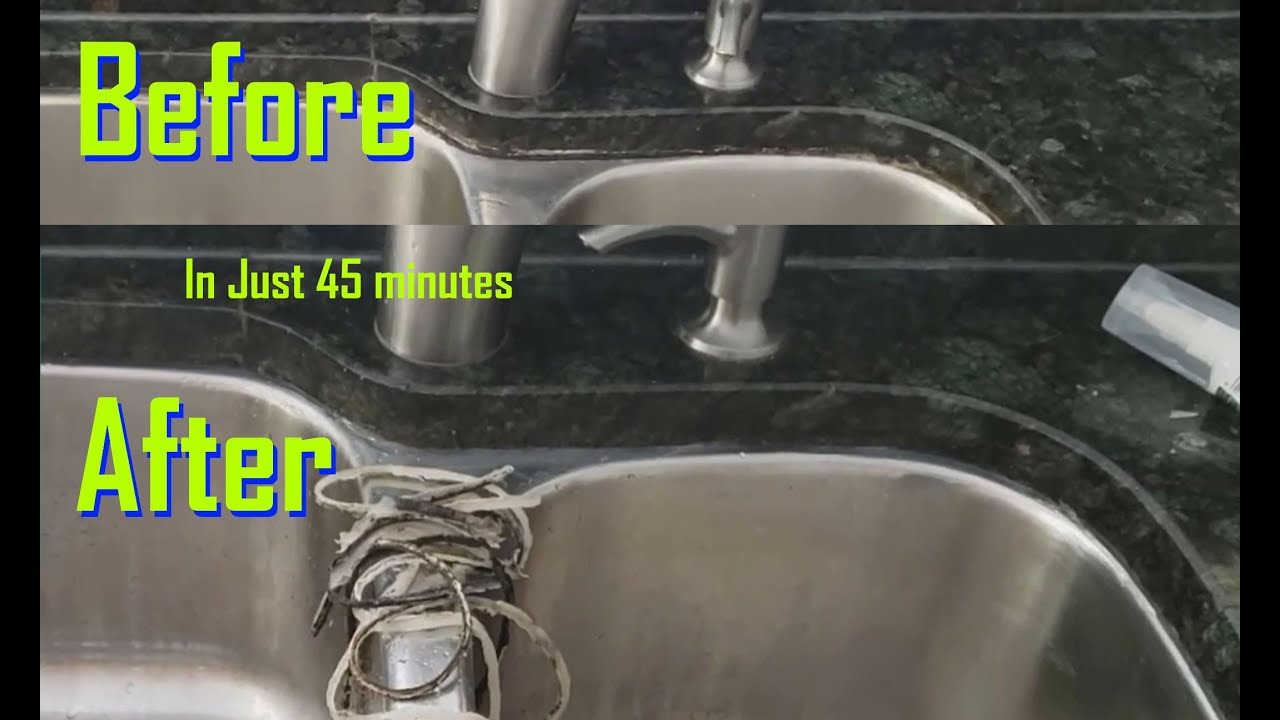
Once you have the tools and supplies, the process of sealing the undermount sink is relatively straightforward. Start by cleaning the countertop and the underside of the sink with an abrasive cleaner. This will remove any dirt and debris. Remove any old caulk and sand it down if necessary. Next, apply a generous bead of silicone caulk to the underside of the sink. Use a putty knife to smooth it out and make sure it is even. Finally, press the sink into place and hold it until the caulk sets. Clean up any excess caulk and you have successfully sealed the undermount sink countertop.
Sealing the Joint Between the Countertop and Sink
Installing an undermount sink is a great way to add a modern touch to any kitchen or bathroom. However, the job isn’t complete without also sealing the joint between the countertop and sink. This is important for two reasons: first, to maintain the integrity of the seal and second, to prevent water from seeping into the countertop, potentially causing damage to the counter and cabinetry. Fortunately, sealing the joint is relatively simple and can be done with a few basic materials.
The first step is to clean the area around the sink and countertop, making sure to remove any dust, debris, and excess sealant. Once the area is clean, use a damp cloth to wipe it down and dry it thoroughly. Next, use a caulk gun and an appropriate sealant to fill the joint. Make sure to apply the sealant evenly and be sure to fill any gaps or cracks. Allow the sealant to dry for at least 24 hours before using the sink.
Finally, use a kitchen-grade mineral oil to seal the joint. Simply apply a thin layer of oil to the joint and allow it to dry for several hours. This will help protect the sealant from moisture and will also prevent it from cracking or peeling over time. With these simple steps, you can ensure that your undermount sink remains securely sealed and looking great for years to come.
Securing the Countertop to the Base Cabinet
Securing the countertop to the base cabinet is an essential step in sealing an undermount sink countertop. Depending on the specific sink and countertop materials, this can be accomplished with one of several methods. First, you’ll need to properly place the sink into the countertop opening. Then, you can use a combination of adhesives, screws, and clips to ensure a secure fit. Adhesives can be used to fill any gaps between the sink and countertop. Screws can be used to secure the sink to the base cabinet, and clips can be used to provide extra stability to the sink and countertop. Finally, you’ll want to use silicone caulk to seal any gaps in the sink and countertop to ensure a waterproof seal. Once all the steps are completed, you’ll have a secure, leak-proof, and stylish undermount sink countertop.
Applying a Finishing Sealant
for an Undermount Sink
Installing an undermount sink is a great way to make a statement in your kitchen or bathroom. To complete the installation, it is essential to properly seal the countertop around the sink. Applying a sealant will prevent water from seeping in between the countertop and the sink and causing damage. But how do you seal an undermount sink countertop?
The process for sealing an undermount sink countertop starts with preparing the surfaces for the sealant. First, it is important to thoroughly clean the countertop and sink so that any debris or dirt won’t interfere with the sealant. Then, apply a caulk to the perimeter of the sink and the countertop. Be sure to smooth out the caulk so that it forms a watertight seal.
Once the surface is ready, it is time to apply the sealant. This can be done with either a brush or roller. Start at one end of the sink and apply the sealant in a continuous line. Be sure to cover the entire area of the sink, including the caulk. Allow the sealant to dry, and then apply a second coat for extra protection.
Finally, to finish the process, buff the sealant with a soft cloth to give the sink a polished look. With the right materials and a little bit of work, sealing an undermount sink countertop is a straightforward process that will help keep the sink and countertop looking new for years to come.
Testing the Seal and Making Adjustments
Properly sealing an undermount sink countertop is crucial for ensuring a secure and lasting installation. Testing the seal and making adjustments is the final step in the process. To begin, fill the sink with water and inspect the seal from underneath the countertop. If any water is leaking, the seal will need to be adjusted. If the seal is good, the water should remain in the sink and not leak out.
If an adjustment is necessary, the countertop must be lifted to access the seal. Once the countertop is lifted, inspect the sealant for any gaps or cracks. If any are found, apply a bead of sealant to the sink flange and the countertop and press the two pieces together firmly. Allow the sealant to dry for 24 hours and inspect the seal again.
In addition, check for any air bubbles between the sink and the countertop. If present, use a razor blade to puncture the bubbles and press the two pieces together firmly. Re-test the seal after making adjustments and ensure that the sink is properly sealed.
By following these steps, you can properly seal an undermount sink countertop and ensure that it is secure and long-lasting. It’s important to be thorough and attentive during the testing process and make necessary adjustments to ensure a good seal.
Maintaining and Cleaning the Undermount Sink Countertop
To ensure your undermount sink countertop is properly sealed and remains in optimal condition, it is important to take the necessary steps to maintain and clean it. Proper maintenance and cleaning will help prevent costly repairs and ensure the longevity of your countertop. To begin, you should always use a mild detergent and a soft cloth to clean the countertop, being sure to rinse the area with warm water after each use. Additionally, you should avoid using harsh chemicals and abrasives when cleaning an undermount sink countertop as they can damage the seal and cause water to seep through.
To seal the countertop, you should use a high-quality sealant specifically designed for the material of your countertop. Be sure to read the product instructions for application and ensure that the countertop is completely dry before applying the sealant. If you are uncertain about the sealant you should use, seek professional advice from a licensed contractor. To ensure the seal remains intact, regularly inspect the countertop for any signs of wear or damage and reseal as needed. With proper maintenance and cleaning, your undermount sink countertop will remain functional and look great for many years to come.
FAQs About the How Do You Seal An Undermount Sink Countertop?
1. What type of sealant should I use to seal an undermount sink countertop?
A: Silicone caulk or a two-part epoxy sealant are the best options for sealing an undermount sink countertop.
2. How do I ensure a good seal when sealing an undermount sink countertop?
A: To ensure a good seal, make sure that the surface of the countertop is clean and dry and that the sealant is applied evenly and in a continuous line.
3. How long does the sealant need to cure before use?
A: Depending on the type of sealant used, curing times can vary from 24 hours to several days. It is important to follow the instructions on the sealant packaging for the best results.
Conclusion
Installing an undermount sink countertop can be a great way to update the look of a kitchen or bathroom. Sealing the countertop properly is essential for protecting the sink from water damage and keeping the sink securely attached to the countertop. The sealing process involves applying a sealant around the perimeter of the sink and allowing it to dry before filling the sink with water. Properly sealing an undermount sink countertop is a relatively easy process and can be done with minimal tools and supplies. With the right materials and procedure, you can have a beautiful and secure undermount sink countertop in no time.