How Do You Replace A Kitchen Strainer?
Replacing a kitchen strainer is a relatively straightforward process that can be done with minimal effort. It is important to make sure that you choose the correct strainer for your sink, as there are many different types available. You will need to measure the size of your sink and the size of the strainer you need before beginning the installation. Once you have the correct size strainer, you can begin by turning off the water supply to your sink, unscrewing the existing strainer, and then carefully removing it from the sink.
Identifying the Need to Replace a Kitchen Strainer
A kitchen strainer is a necessary tool for any home cook. It is used to strain cooking liquids, such as stock, sauces, and broth, as well as to strain out particulates from soups and other dishes. It is also used to strain out food particles from fruit juices and other drinks. While kitchen strainers are durable and designed to last for many years, they will eventually need to be replaced. Knowing when to replace your kitchen strainer and how to do it correctly can help you maintain a safe and healthy kitchen.
A kitchen strainer should be replaced when it begins to show signs of wear and tear, such as rust, cracks, or discoloration. It is important to inspect your kitchen strainer regularly to ensure that it is in good condition. If you notice any signs of damage, it is best to replace it with a new one. Additionally, kitchen strainers should be replaced if they become clogged or show signs of corrosion.
Replacing a kitchen strainer is a fairly simple process. First, you should make sure that you have the right type of strainer for the job. Different types of kitchen strainers are designed for different tasks, so it is important to select the one that is best suited for your needs. Once you have the right strainer, you should follow the manufacturer’s instructions for installation. It is important to make sure that the strainer is securely installed to ensure that it operates properly and safely. After installation, it is a good idea to check the strainer periodically to make sure that it is still in good condition.
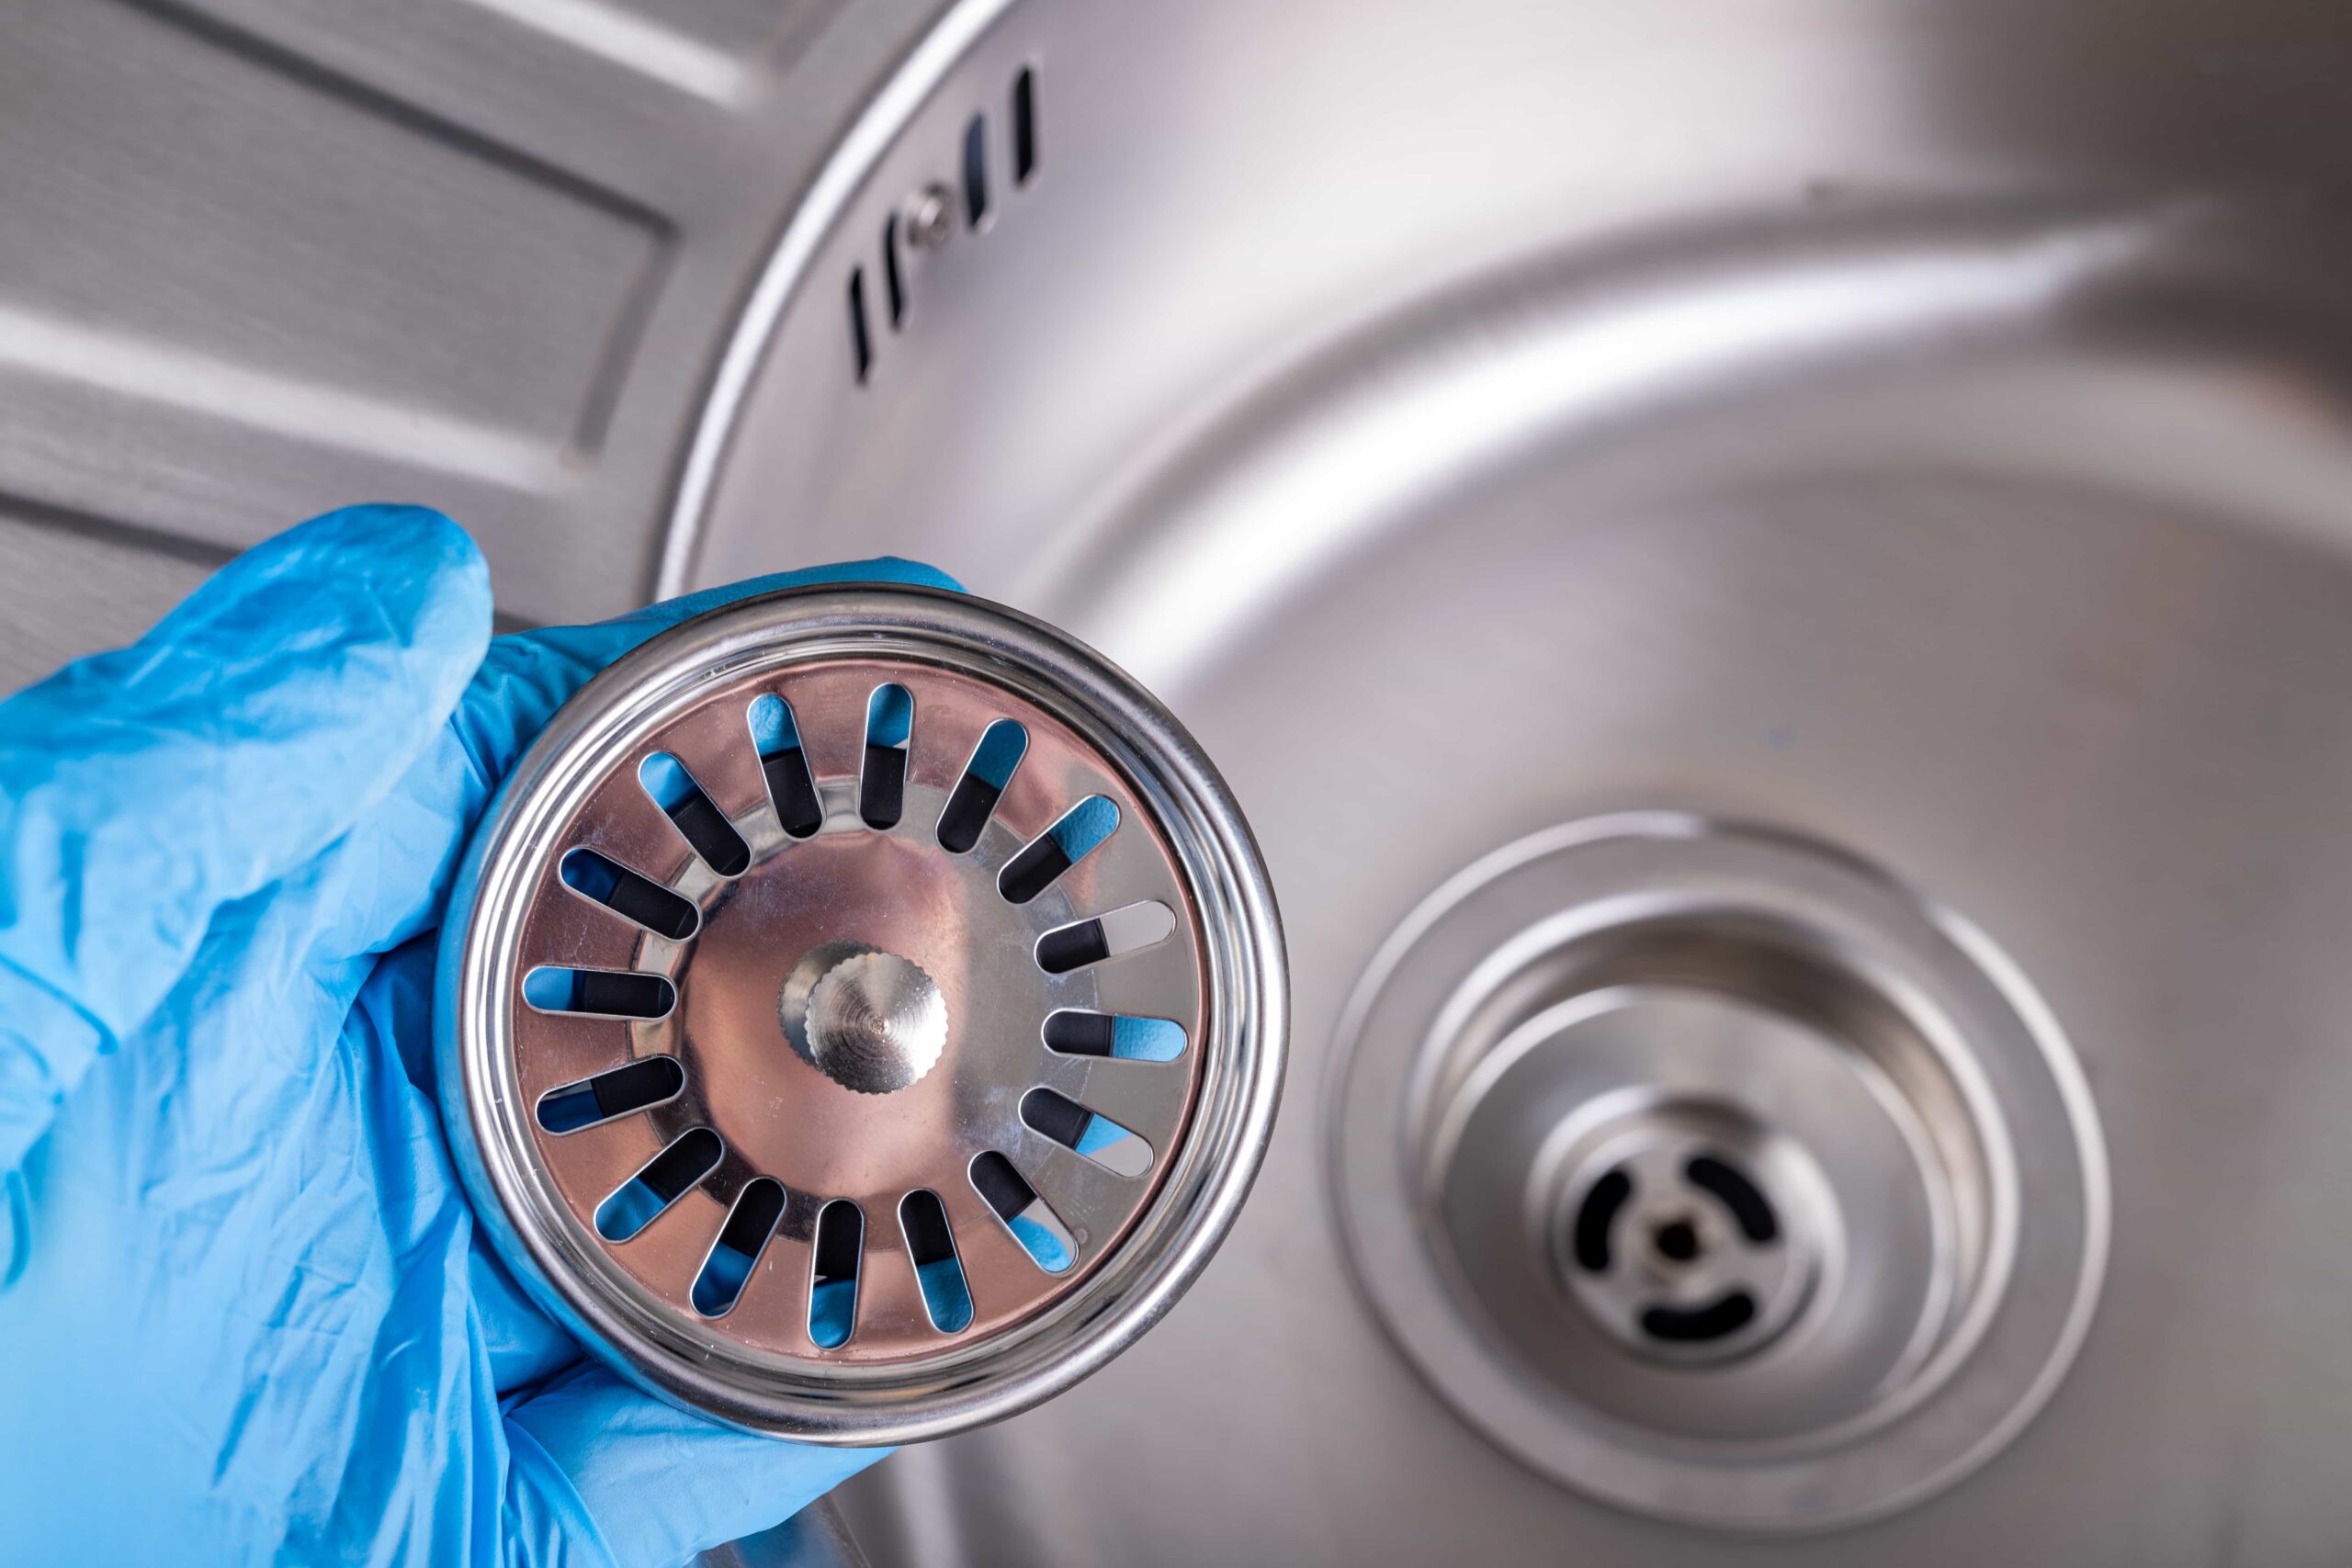
Types of Kitchen Strainers
Kitchen strainers come in all shapes and sizes, from classic metal strainers to fine mesh filters. Depending on the type of strainer you’re looking for, there are several varieties to choose from. Colanders are the most popular kitchen strainers, usually made of stainless steel or hard plastic and featuring a bowl-shaped design with several holes in it for draining liquid. Strainer baskets are designed for more specific tasks, such as sifting flour or sugar, and come in various sizes and shapes. Mesh strainers are usually made of wire mesh and come in various sizes, from small sifters to large colanders. Finally, fine mesh strainers are designed to filter out small particles, such as when making tea or infusing oils.
Knowing the types of kitchen strainers available can help you choose the right one for your needs. When looking to replace a kitchen strainer, consider the items you’ll be straining, the size of the strainer, and the material it’s made of. Metal strainers are more durable and can handle heavy-duty tasks, while plastic strainers are better for lighter tasks. Mesh strainers are ideal for sifting dry ingredients, while fine mesh strainers are great for filtering out small particles. No matter what type of strainer you’re looking for, there’s a perfect one for every kitchen task.
Selecting and Installing a New Strainer
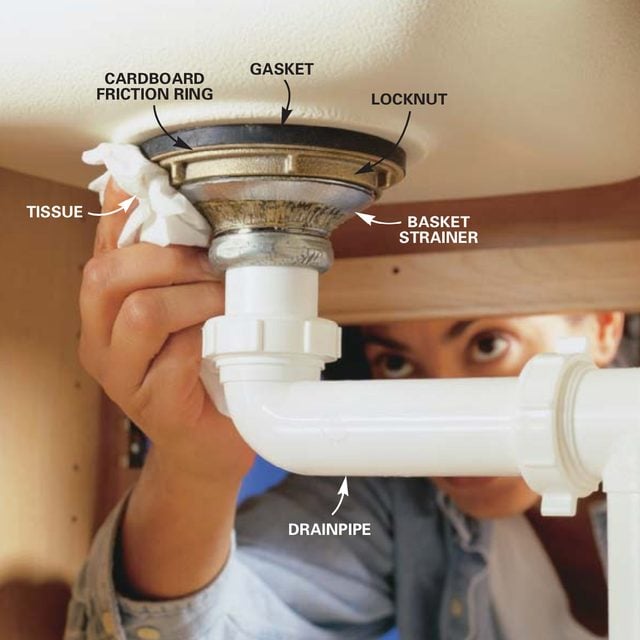
Replacing a kitchen strainer can be an intimidating task for a homeowner, but with the right steps, it’s possible to do it yourself. To begin, it’s important to select the right strainer for your kitchen sink. Consider the size and shape of the sink, the type of material it is made from, and the type of strainer you prefer. Once you’ve selected a strainer, the next step is to install it. Start by turning off the water supply and removing any existing strainer. Then, use a wrench to loosen the nuts that hold the strainer in place. Place the new strainer in the drain hole and secure it with the nuts. Lastly, test the strainer to make sure it is properly working.
By following the steps outlined above, anyone can replace their kitchen strainer without the help of a professional. It’s a great way to save money and time and to give your kitchen a new look. Furthermore, a properly installed strainer will ensure that your kitchen sink remains free from clogs and other issues. So, don’t be intimidated, take the time to select and install a new strainer and you’ll be glad you did.
Cleaning and Maintaining a Strainer
Having a kitchen strainer in your home is a great way to keep your kitchen sink clean and functioning properly. However, over time, the strainer can become clogged, rusty, or just worn out. When this happens, it’s important to know how to properly replace the strainer to maintain the functionality of your kitchen.
The first step in replacing your kitchen strainer is to remove the old one. This is done by using a wrench to loosen and unscrew the strainer from the sink. Once the strainer is removed, you can then clean the sink and any other components that were connected to the strainer.
Next, you’ll need to choose a new strainer. Make sure the strainer you select is designed to fit the size of your sink and that it’s made out of a durable material, such as stainless steel or copper. When selecting a strainer, you should also consider what type of filter it has, such as a mesh or perforated filter.
Once you’ve chosen a new strainer, you’ll need to install it. This is done by first attaching the strainer to the sink and then securely tightening it with a wrench. Once the strainer is installed, you can then attach any other components, such as the drain pipe and tailpiece.
FAQs About the How Do You Replace A Kitchen Strainer?
1. What kind of tools do I need to replace a kitchen strainer?
You will need a screwdriver, pliers, and a replacement strainer.
2. Do I need to turn off the water before replacing the strainer?
Yes, you should turn off the water supply to the sink before replacing the strainer.
3. How often should I replace my kitchen strainer?
It is recommended to replace your kitchen strainer every 3-5 years.
Conclusion
Replacing a kitchen strainer is a relatively simple task that will require a few basic tools and a few steps. First, remove the old strainer, clean the area around the sink, and then install the new strainer. Make sure to secure the strainer properly and use a plumber’s putty or silicone sealant to seal the strainer to the sink. Finally, test the strainer for proper functionality before using it. With the right tools and proper installation steps, you can easily replace a kitchen strainer.