How Can I Fix My AC On My Own?
If your air conditioner is not working properly, there are a few steps you can take to try to fix it on your own. Knowing what kind of air conditioner you have, how to identify common problems, and how to properly maintain your air conditioner can help you to fix it quickly and easily. This guide will provide you with the information you need to do just that. With the right knowledge and a few tools, you can fix your air conditioner on your own and save yourself time and money.
Assessing the Problem
Assessing the issue with an air conditioner is key before attempting to fix it. To do this, take a look at the thermostat. If it is working correctly, check the filter and clean or replace it if necessary. If this doesn’t work, it may be a problem with the air compressor, evaporator, or condenser. Listen for strange noises and inspect the system for leaks or other signs of damage. Another issue to consider is whether or not the air conditioner is getting enough power. Check the circuit breakers to make sure they are working properly. If all else fails, it may be time to call a professional.
Understanding Your AC System
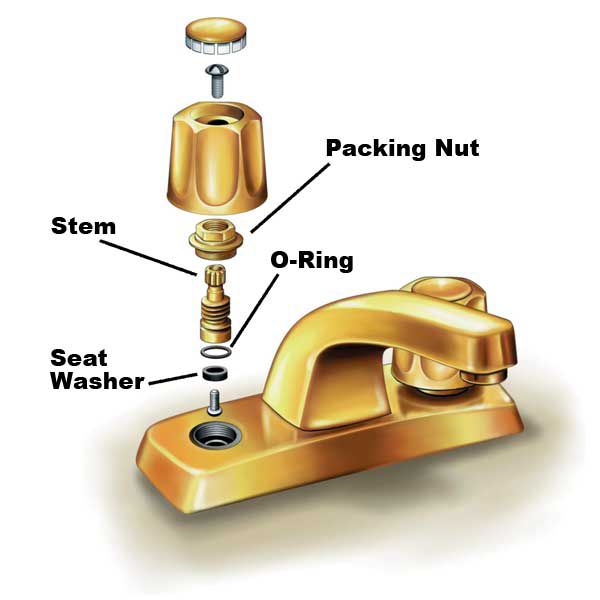
Understanding the anatomy of your air conditioning system is the key to successful DIY repair. It’s important to know the basics of how your system works before you attempt to fix it on your own. This article will take you through the basics of how an air conditioning system works, and what you need to know when troubleshooting and diagnosing a problem.
The primary components of an air conditioning system include an evaporator coil, condenser coil, compressor, and expansion valve. The evaporator coil absorbs heat from the air in your home, while the condenser coil releases the heat outside. The compressor pushes the refrigerant through the system, and the expansion valve regulates the flow of refrigerant.
To properly diagnose and repair your AC system, it’s important to understand how each of these components works together. The evaporator coil and condenser coil need to be monitored for proper operation, and the compressor and expansion valve should be checked for any blockage or leakage. Additionally, you should be aware of any sounds or smells that could indicate an issue with your system.
By understanding the basics of your air conditioning system, you can confidently troubleshoot and diagnose any problems you may be having. With the right knowledge and tools, you can repair your AC on your own and save money on costly repairs.
Credit: accurateairac.com
Preparing the Work Area
When it comes to tackling DIY projects around your home, it is essential to prepare the work area before you begin. When it comes to fixing your air conditioner, this is especially true. Before you begin, make sure you have all the necessary tools and supplies to complete the job, and make sure the room or area you are working in is well-ventilated and free of any obstructions. Additionally, you should shut off the power to the air conditioner before you begin any work. Once the work area is prepped and ready to go, you can begin the process of fixing your air conditioner.
Checking the Thermostat
When it comes to fixing your air conditioning unit, the first step you should take is to check the thermostat. The thermostat is the device that tells the air conditioner when to turn on and off. If the thermostat is not set properly, your AC may not cool your home effectively or efficiently. You can check the thermostat settings by using its digital display or by adjusting the dial. If the settings are not correct, you can change them according to the manufacturer’s recommendations. Additionally, you should also check to make sure that the thermostat is receiving power. If the thermostat is not receiving power, you will need to check the wiring or replace the unit. Taking the time to check the thermostat is an easy and important step in troubleshooting your AC unit.
Cleaning the Air Filter
If your air conditioner isn’t working as efficiently as it used to, the issue may be as simple as a dirty air filter. Clogged air filters are a common cause of AC problems, reducing airflow, and making it difficult for your system to cool your home. Fortunately, cleaning the air filter is a simple process that can be done with a few tools and some elbow grease.
Start by shutting off the power to your air conditioner and removing the cover from the unit. Then, locate the air filter, which is usually located near the return duct. Remove the air filter and inspect it for dirt and debris. If the filter is dirty, use a vacuum or a brush to remove the dirt and buildup. Once the filter is clean, replace it in the unit and secure the cover.
By cleaning the air filter, you can help maximize your air conditioner’s efficiency and save money on energy bills. To ensure your system keeps running efficiently, it’s important to regularly clean or replace the air filter. Cleaning the air filter is just one of the many ways you can take care of your AC on your own.
Checking the Condenser
Coil
When it comes to DIY air conditioner repairs, one of the most important steps is checking the condenser coil. An AC condenser coil is a heat exchanger used to transfer the heat from the refrigerant to the outside air. The condenser coil is an essential component of an air conditioner, and it is important to make sure it is functioning correctly. If the condenser coil is not working properly, it can cause the air conditioner to become less efficient, use more energy, and not cool the air as effectively. To check the condenser coil, start by turning off the power to the unit. Then, remove the access panel from the outside of the unit and inspect the coil for any dirt or debris that may be blocking the airflow. If there is any debris, use a vacuum to remove it. Once the coil is clean, turn the power back on and test the unit. If the unit is still not running properly, it may be time to call a professional.
Checking the Evaporator Coil
Air conditioners are complex machines that need proper maintenance to run efficiently. If you are having trouble with your air conditioner and want to fix it on your own, it is important to have a basic understanding of how it works. One of the key parts of an air conditioner is the evaporator coil. The evaporator coil is responsible for cooling the air inside the home. If the evaporator coil is dirty or clogged, it can prevent the air conditioner from running properly. To check the evaporator coil, you can take off the front panel of the air conditioner and inspect it. If the coil is full of dirt or debris, you will need to clean it using a vacuum cleaner. If the coil is still dirty after cleaning, you may need to replace it. In some cases, a faulty evaporator coil can be repaired, so it is important to check for any loose connections or damaged parts. Once you have properly inspected and cleaned the evaporator coil, you can replace the front panel and test the air conditioner to make sure it is running properly. If it is still not working, you may need to call a professional for help.
Replacing Parts and Adding Refrigerant (if needed)
When it comes to fixing your air conditioner (AC) on your own, certain steps need to be taken to ensure the repair is successful. This includes replacing any faulty parts, and adding refrigerant if needed.
Replacing faulty parts is the first step in making a successful AC repair. The most common parts that need to be replaced in an AC unit are the fan motor, the condenser fan motor, and the evaporator coil. These parts can be easily purchased at any hardware store and should be replaced according to the manufacturer’s instructions.
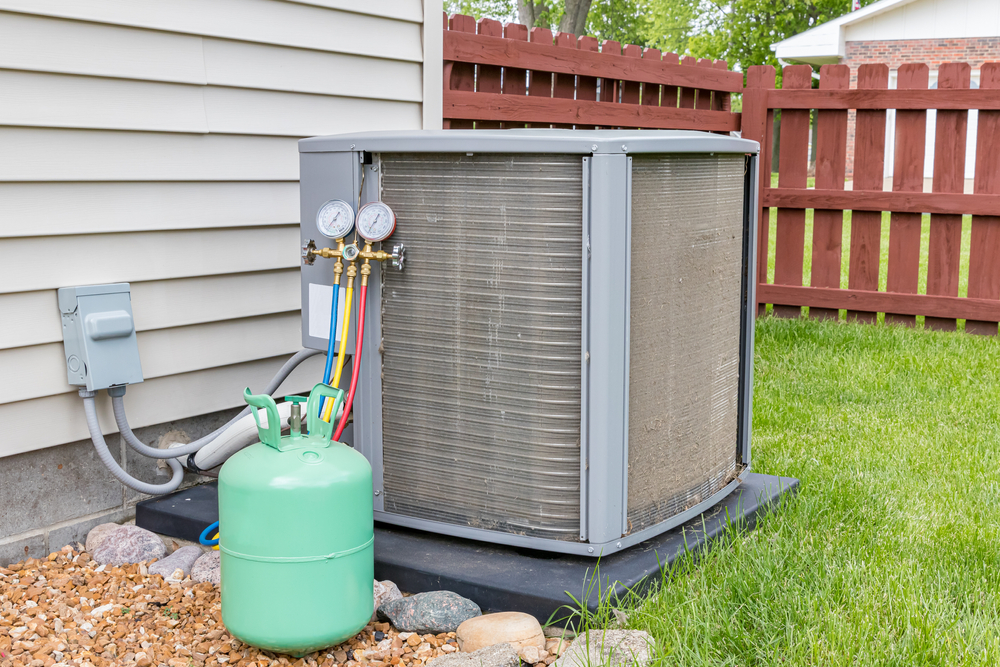
Once the parts have been replaced, it is important to add refrigerant to the AC unit. This can be done by obtaining a refrigerant charging kit from your local hardware store and following the instructions provided by the manufacturer. It is important to make sure that the right amount of refrigerant is added as an overcharge or undercharge can cause damage to the AC unit.
By following these steps, you can successfully repair your air conditioner on your own. It is important to always consult the manufacturer’s instructions and safety precautions before attempting to make any repairs. Additionally, if you are not confident in your ability to repair, it is best to contact a professional for assistance.
FAQs About the How Can I Fix My AC On My Own?
Q1: How do I know if my AC needs fixing?
A1: If your AC is not blowing cold air, is making strange noises, or is not running efficiently, then it may need to be fixed. You can also check for any visible signs of damage or leaks in the unit.
Q2: What tools do I need to fix my AC?
A2: It depends on the type of repair you are attempting to do. You will need basic tools such as screwdrivers, pliers, and wrenches. Additionally, you will need a voltmeter to test the electrical components and a vacuum to clean any dirt or debris.
Q3: What are some common AC problems that I can fix myself?
A3: Common AC problems that you can fix yourself include checking and replacing the air filter, cleaning the condenser coils and evaporator coils, and checking the thermostat settings. Additionally, you can check for any loose parts, clogged drains, or leaks in the unit.
Conclusion
It is possible to fix your AC on your own, but it is important to make sure that you are familiar with the unit and have the proper tools and knowledge to do so. It is also important to follow all safety instructions when working on an AC unit. If you are not confident in your ability to fix it on your own, it is best to contact a professional to ensure that the job is done correctly.